
There is something truly magical about a perfect individual dessert. It is elegant, it is portion controlled, and it feels like a special treat just for you. Today, I am thrilled to share my absolute favorite recipe for no bake cheesecake cups, a perfectly portioned spin on a traditional no bake cheesecake. This article provides a foolproof method and all the expert tips you need for stunning results every time. Get ready to create delightful, creamy mini cheesecakes with a unique special touch that will impress everyone.
Table of Contents
Table of Contents
Why You’ll Love These No Bake Cheesecake Cups
What makes my no bake cheesecake cups truly stand out is a subtle but impactful twist. I incorporate one tablespoon of toasted graham cracker crumbs directly into the cheesecake filling mixture. This happens after beating the cream cheese and granulated sugar, but before folding in the whipped cream.
The reason for this ingenious addition is simple yet scientific. Toasting a small portion of graham cracker crumbs intensifies their nutty flavor. This adds a nuanced, sophisticated undertone to the creamy filling that beautifully complements the graham cracker crust. Furthermore, integrating these crumbs into the filling offers a delicate textural contrast. They also help to absorb any excess moisture, which contributes to a slightly firmer and more cohesive set. You get this enhanced stability without sacrificing the characteristic mousse-like lightness that whipped cream provides. This unique method truly elevates both the flavor and the reliability of your dessert.
These no bake cheesecake cups offer several fantastic benefits for any home cook or party planner.
First, you will adore the effortless elegance these individual servings bring. They are perfect for parties, holidays, or simply as a delightful weeknight indulgence.
Next, you can count on reliable results. My unique twist ensures a more stable and consistently flavorful filling every time you make them.
You will also appreciate that no oven is required for the filling. This makes them an ideal dessert for warm weather or when your oven is already busy with other dishes.
Finally, these convenient individual sizes offer perfect portion control. This makes enjoying your favorite dessert guilt-free and easy.
Ingredients Needed
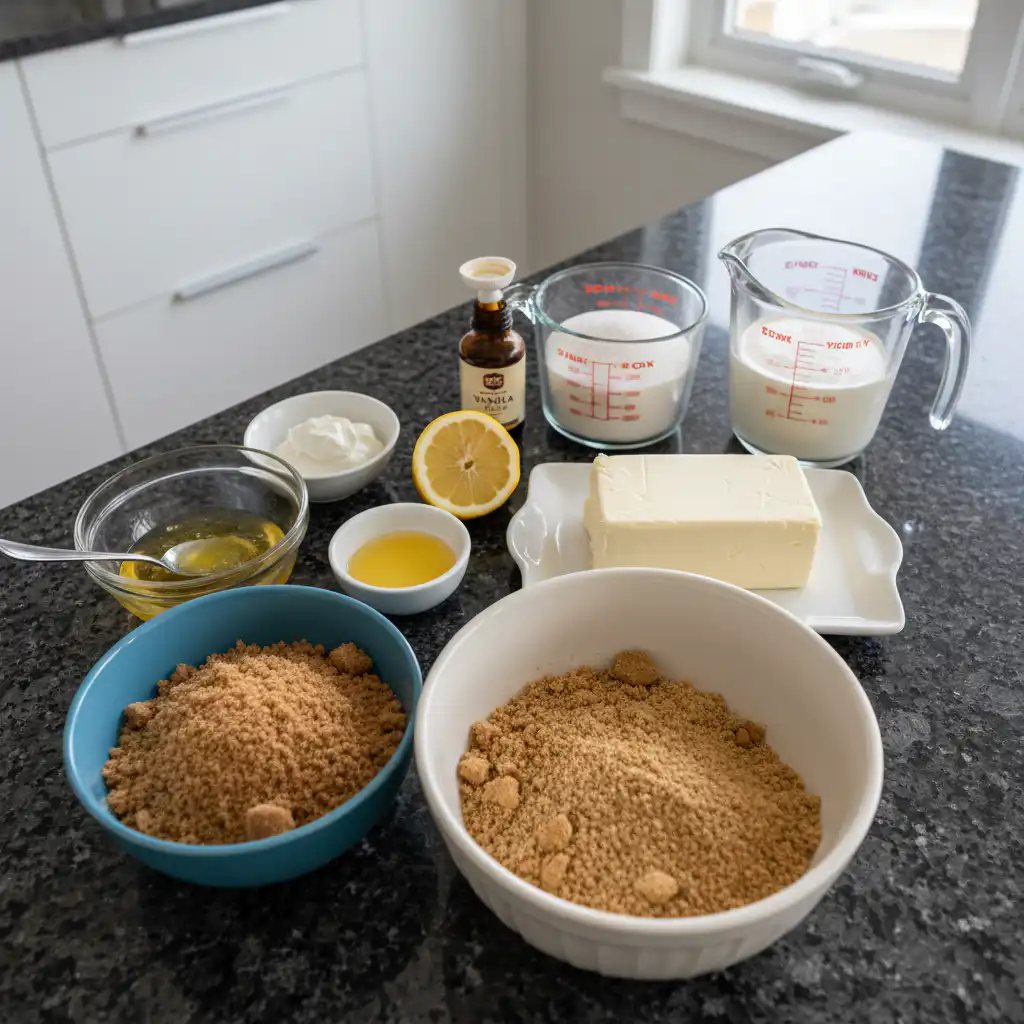
* 2 cups (240g) graham cracker crumbs (about 16 full sheet graham crackers)
* 1/3 cup (67g) packed light or dark brown sugar
* 1/2 cup (8 Tbsp; 113g) unsalted butter, melted
* 1 cup (240ml) cold heavy cream or heavy whipping cream
* 16 ounces (452g) full-fat brick cream cheese, softened to room temperature
* 1/3 cup (67g) granulated sugar
* 2 Tablespoons (30g) sour cream or plain yogurt, at room temperature
* 1 teaspoon fresh lemon juice
* 1/2 teaspoon pure vanilla extract
* optional: your desired toppings (see recipe Note)
Ingredient Notes & Substitutions
Regarding cream cheese, I always recommend using full-fat brick cream cheese for these no bake cheesecake cups (a rule I also follow when making my favorite banana cake with cream cheese frosting). Low-fat cream cheese or the spreadable kind that comes in a tub simply will not provide the necessary structure to set properly. This is crucial for a firm, luscious texture.
For the heavy cream, it is essential that it is very cold when you start whipping it. Cold heavy cream is key to achieving stiff peaks, which are crucial for a thick and sturdy cheesecake filling. Heavy cream and heavy whipping cream are very similar and can generally be used interchangeably in this recipe. Both contain at least 36% milkfat.
The importance of room temperature ingredients for the cream cheese and sour cream or yogurt cannot be overstated. When these ingredients are at room temperature, they blend smoothly and easily. This prevents any lumps in your delicate no bake cheesecake filling.
If you are outside the US and cannot find graham cracker crumbs, digestive biscuits are an excellent alternative. You will need about 2 cups or 240g. You might need to make slight adjustments to the amount of sugar or melted butter to achieve the perfect crust consistency.
Sour cream or plain yogurt plays a lovely role in the filling. They add a delicate tang that balances the sweetness and contributes to the overall creamy texture.
Fresh lemon juice and pure vanilla extract are more than just flavorings here. The lemon juice brightens all the flavors, cutting through the richness, while vanilla extract enhances the overall dessert experience.
How to Make No Bake Cheesecake Cups
Crafting these delightful no bake cheesecake cups is a straightforward and rewarding process. Follow these steps for perfect results.
Step-by-Step Instructions:
1. Prepare Muffin Pans
Line two standard 12-count muffin pans with cupcake liners. Make sure you have enough space in your refrigerator for both pans, as they will need to chill later.
2. Make the Crust
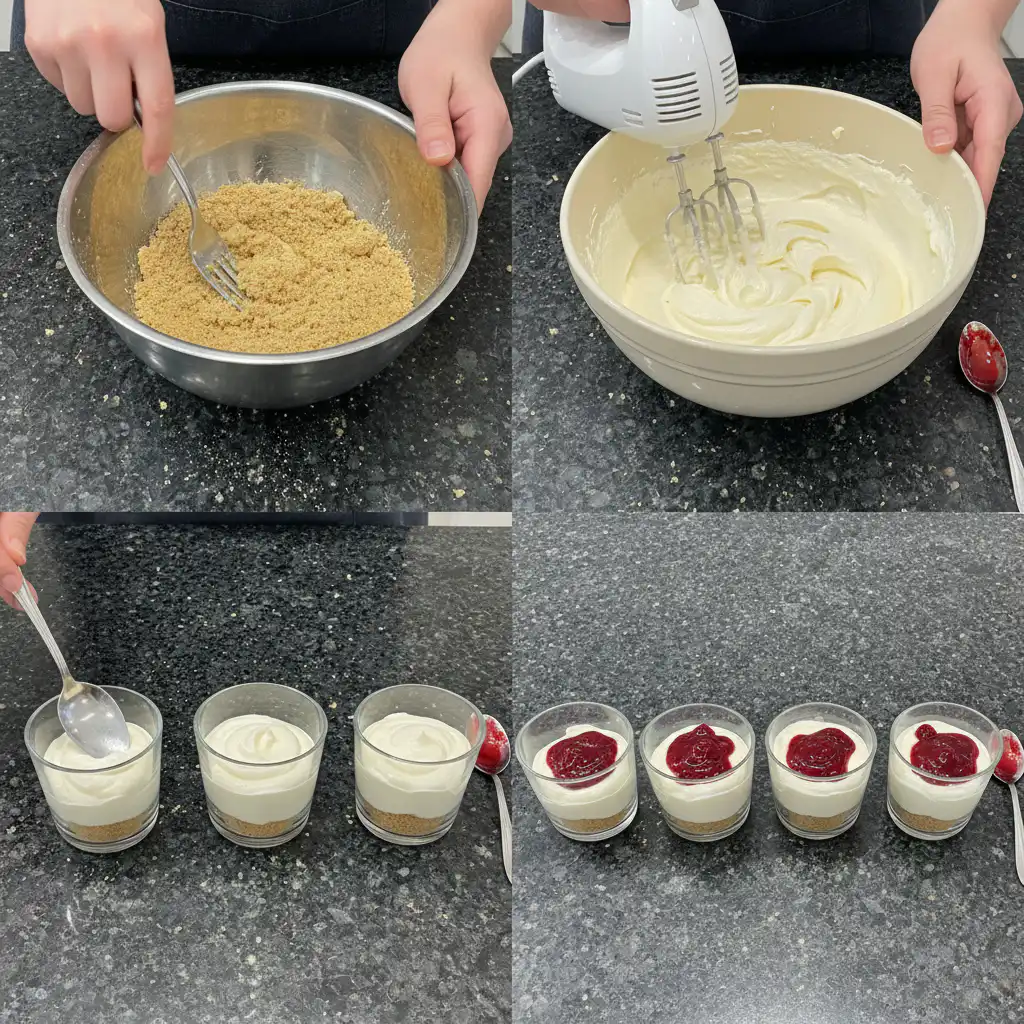
If your graham crackers aren’t already crumbs, pulse them in a food processor until fine. Transfer to a medium bowl and mix with brown sugar and melted butter until the texture resembles wet sand.
Spoon about 1½ tablespoons of the mixture into each liner, then press it down firmly with the back of a spoon to create a solid base.
3. Optional Crust Bake
For a sturdier crust, bake at 350°F (177°C) for 5 minutes. This step is optional but recommended.
If you skip baking, the crust will be softer and slightly crumbly. If baked, let the crusts cool for about 10 minutes before adding the filling.
4. Whip Cream & Prepare Filling
Using a hand or stand mixer, whip the cold heavy cream on medium-high speed until stiff peaks form (about 3 minutes). Set aside.
In another bowl, beat the softened cream cheese and sugar until smooth and creamy. Scrape down the sides as needed.
Add sour cream (or yogurt), lemon juice, and vanilla extract. Beat until fully combined and smooth. Make sure there are no lumps.
Toast 1 tablespoon of graham cracker crumbs in a dry skillet until lightly golden. Let cool, then mix into the filling for extra flavor.
Gently fold the whipped cream into the mixture using a spatula. Do this slowly to keep the texture light and airy.
5. Fill the Liners
Spoon or pipe about 2 tablespoons of filling over each crust.
For a cleaner look, use a piping bag with a star or round tip. Smooth the tops gently with the back of a spoon if needed.
6. Chill & Set
Refrigerate the cheesecake cups in the pans for at least 3 hours.
If chilling longer, cover with foil or plastic wrap to keep them fresh and prevent fridge odors.
7. Serve
Keep refrigerated until ready to serve. They may soften if left at room temperature for too long.
Add your favorite toppings before serving for extra flavor.
8. Store Leftovers
Cover and store any leftovers in the refrigerator for up to 5 days.
Perfecting Your Presentation: Piping Tips & Unmolding Secrets
Achieving a professional look for your no bake cheesecake cups is easier than you think with a few simple techniques.
Choosing the Right Piping Tip
Using a piping bag greatly enhances the presentation of your no bake cheesecake cups. It offers a much cleaner and more professional finish compared to simply spooning the filling. A star piping tip will give you those beautiful, classic ridged swirls, creating an elegant and decorative flourish on top of each cheesecake. For a smooth, minimalist mound, a round piping tip is your best friend. Both options elevate the visual appeal of your individual desserts. If you do not have a piping bag, a sturdy zipped-top bag with a corner snipped off works perfectly in a pinch.
Effortless Unmolding Techniques
Unmolding your no bake cheesecake cups from their cupcake liners without damage is key to a polished presentation. Here are my top tips:
First, ensure adequate chilling time. A thoroughly chilled cheesecake will be much firmer and easier to handle. Just before serving, you can briefly chill the cheesecakes in the freezer for 10 to 15 minutes. This will firm them up slightly, making the liners easier to peel away.
When removing, gently twist the liner around the base of the cheesecake. This often helps to loosen it.
If you frequently find them sticking, consider using slightly larger cupcake liners. You could also lightly spritz the inside of your liners with a non-stick cooking spray before adding the crust. Foil liners also tend to peel away more easily than some paper liners.
Pro Tips & Troubleshooting for No Bake Cheesecake Cups
Even for experienced chefs, a few expert tips can make all the difference, and knowing common mistakes to avoid can save your dessert.
Pro Tips for Success
First, cold is key for cream. Always start with very cold heavy cream when whipping to achieve stiff peaks. This is absolutely non-negotiable for a stable filling.
Next, always use full-fat brick cream cheese. This is paramount for the proper setting and luxurious texture of your no bake cheesecake cups. Low-fat varieties simply will not work.
Room temperature ingredients are essential for smoothness. Ensure your cream cheese and sour cream or plain yogurt are at room temperature. This prevents lumps and guarantees a velvety filling.
Master the fold. When incorporating the whipped cream into the cream cheese mixture, be gentle. Use a silicone spatula and fold slowly to maintain the airy volume and the cheesecake’s mousse-like lightness.
Chill time is non-negotiable. Allow at least 3 hours for your no bake cheesecake cups to set properly. Do not try to rush this process by using the freezer, as it can negatively affect the texture.
Be aware of environmental factors. High humidity might slightly extend the setting time, so plan accordingly on particularly muggy days.
Finally, do not rush the toast. For our unique twist, ensure your graham cracker crumbs are toasted evenly until fragrant and lightly golden. Allow them to cool slightly before folding them into the filling.
Common Mistakes to Avoid
A common pitfall is using low-fat cream cheese. This will inevitably result in a runny, unset no bake cheesecake that simply will not hold its shape.
Avoid overmixing the whipped cream once it has been folded into the cream cheese mixture. This can deflate the delicate air bubbles and lead to a denser filling rather than a light, airy one.
Insufficient chilling is another frequent issue. Not chilling your no bake cheesecake cups long enough will lead to a soft, unset filling that lacks structure.
Never attempt to freeze the cheesecakes to speed up the setting process. This can cause an uneven, icy texture and a hard, unpleasant crust. Proper refrigeration is key.
Leaving your no bake cheesecake cups at room temperature for too long will cause them to soften considerably and potentially stick to the liners, making them difficult to serve neatly. Aim to keep them chilled until just before serving.
Finally, a lumpy filling can be disappointing. Ensure you beat the cream cheese thoroughly with the granulated sugar until it is completely smooth, scraping the bowl often with your silicone spatula.
Serving & Storage
Presenting and preserving your no bake cheesecake cups perfectly will ensure maximum enjoyment.
Serving Ideas
The beauty of these mini cheesecakes is how versatile they are with toppings.
For a classic and refreshing touch, try fresh berries like vibrant strawberries, blueberries, or raspberries. A drizzle of homemade strawberry sauce is also a fantastic choice.
If you are craving decadence, a rich chocolate ganache or warm hot fudge sauce works wonders. You can spoon these over the tops before refrigerating, allowing them to set alongside the cheesecake.
For something tangy and bright, a spoonful of lemon curd, a dollop of apple butter, or your favorite fruit preserves adds a lovely contrast.
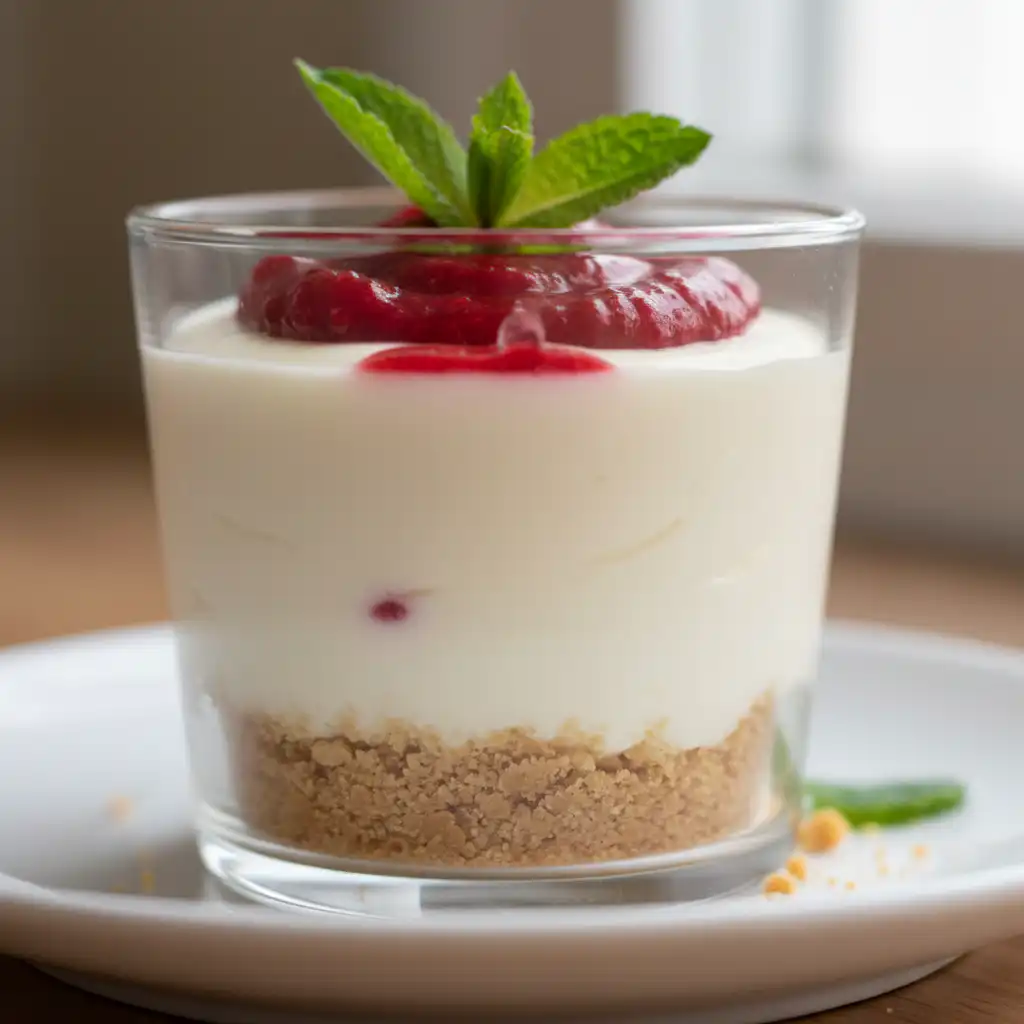
Do not forget simple garnishes. A few fresh mint leaves can add a pop of color and freshness. A sprinkle of extra toasted graham cracker crumbs can reinforce the flavor profile.
For themed desserts or holidays, consider adding food coloring to the cheesecake filling for a fun, festive look.
Storage and Make-Ahead
For refrigerator storage, any leftover mini cheesecakes should be covered tightly and placed back into the refrigerator. They will remain delicious for up to 5 days. Covering them prevents them from drying out or absorbing any unwanted odors from the fridge.
These no bake cheesecake cups are truly excellent for making ahead. You can prepare them up to 2 days in advance. In fact, extended chilling time often benefits the texture and allows the flavors to meld beautifully.
For longer storage, freezing is an option. Once the cheesecakes are fully set and firm from refrigeration, transfer them to an airtight container or a freezer-safe bag. They can be frozen for up to 1 to 2 months. When you are ready to enjoy them, thaw them in the refrigerator for the best texture and consistency.
Conclusion
I hope you feel inspired to make these easy no bake cheesecake cups in your own kitchen. Their creamy texture, paired with the subtle nutty flavor from the toasted graham cracker twist, makes every bite truly irresistible.
With these simple tips and techniques, you can create perfect results every time whether you’re an experienced baker or just getting started with no-bake desserts.
Do not hesitate to experiment with various toppings and crust variations to make them truly your own, or try my seasonal no bake pumpkin cheesecake cups for a fun twist. Please print this recipe, share it with friends, and explore other delicious dessert recipes here on my blog, like my easy no-bake chocolate peanut butter bars. Happy no-baking!
FAQ
1. What are mini no-bake cheesecakes and how do they differ from baked cheesecakes?
Mini no-bake cheesecakes are individual servings of a creamy, rich dessert that sets in the refrigerator. They use stabilizers like cream cheese and whipped cream instead of eggs and oven heat. Their texture is typically lighter and airier compared to the denser, richer consistency of traditional baked cheesecakes.
2. What are the most crucial ingredients for ensuring no-bake cheesecake cups set properly?
The most crucial ingredients for proper setting are full-fat brick cream cheese and properly whipped cold heavy cream (or heavy whipping cream). These provide the essential structural integrity. Our unique addition of toasted graham cracker crumbs into the filling also contributes to enhanced stability.
3. Can I make these no-bake cheesecake cups ahead of time and how should I store them?
Yes, these no bake cheesecake cups are perfect for making ahead! Store them covered in the refrigerator for up to 5 days. For longer storage, they can be frozen for up to 1-2 months. Thaw them in the refrigerator for the best texture.
4. How do I prevent the no-bake cheesecake filling from sticking to the cupcake liners?
Ensure adequate chilling time for your no bake cheesecake cups. Gently peel the liners from the bottom up. For extra insurance, you can lightly spray the inside of the liners with non-stick spray or use foil liners, which tend to peel away easier. A brief freeze for 10-15 minutes just before serving can also help firm them enough for easy removal.
5. What are some popular and creative topping ideas for mini no-bake cheesecakes?
Popular topping ideas include fresh berries like strawberries, blueberries, or raspberries, and delicious strawberry sauce. Other creative options are tangy lemon curd, rich salted caramel, decadent chocolate ganache, or warm hot fudge sauce. For garnishes, consider fresh mint leaves or a sprinkle of extra toasted graham cracker crumbs.
6. What are common mistakes to avoid when making no-bake cheesecake cups?
Common mistakes to avoid include using low-fat cream cheese, not chilling the cheesecakes long enough, overmixing and deflating the whipped cream, and attempting to freeze them to speed up the setting process.
7. Can I add food coloring to no-bake cheesecake cups?
Yes, you certainly can! Gel food coloring can be added to the cheesecake filling mixture after it is fully combined, but before you fold in the whipped cream. This is a fantastic way to customize them for themed desserts or holiday colors.
8. Why do room temperature ingredients matter for cheesecake filling?
Bringing cream cheese and sour cream or plain yogurt to room temperature is essential for achieving a smooth, lump-free filling. Cold cream cheese, for example, will not blend as easily with the sugar and other ingredients, often resulting in a grainy or lumpy texture.
Easy No Bake Cheesecake Cups: The Ultimate Creamy Treat
Ingredients
Equipment
Method
- Line two standard 12-count muffin pans with cupcake liners. Before you begin, make sure you have enough room in your refrigerator for both pans. You will need to refrigerate them in step 6.
- If your graham crackers are not already crumbs, use a food processor to pulse them into fine crumbs. Pour the crumbs into a medium bowl and stir in the brown sugar and melted unsalted butter until well combined. The mixture will resemble wet sand. Spoon about one and a half tablespoons of this graham cracker crust mixture into each cupcake liner. Then, use the back of a spoon to pack it down tightly. This creates a sturdy base for your no bake cheesecake cups.
- This next step is entirely optional, but I highly recommend it. For a slightly sturdier graham cracker crust, bake them for a quick 5 minutes in a 350°F (177°C) oven. If you prefer a fully no-bake option or cannot use your oven, you can skip this step; the crust will simply be a bit crumblier. If you choose to bake, allow the warm crusts to cool for about 10 minutes before adding the creamy filling.
- First, using a hand mixer or a stand mixer fitted with a whisk attachment, whip the cold heavy cream into stiff peaks on medium-high speed. This should take about 3 minutes. Set this light and airy whipped cream aside. Next, using your mixer fitted with a whisk or paddle attachment, beat the softened full-fat brick cream cheese and granulated sugar together on medium speed until the mixture is completely smooth and creamy. Be sure to scrape down the sides and up the bottom of the bowl with a silicone spatula as needed to ensure even mixing. Add the room temperature sour cream or plain yogurt, fresh lemon juice, and pure vanilla extract. Beat this on medium-high speed for about 1 minute until everything is smooth and perfectly combined. Double-check for any large lumps of cream cheese; if you find any, continue beating until absolutely smooth. Now, for my special twist: quickly toast one tablespoon of graham cracker crumbs in a dry skillet over medium heat for a few minutes until fragrant and lightly golden. Let them cool slightly. Add these toasted graham cracker crumbs to the cream cheese mixture, mixing gently to combine. This adds a beautiful nutty depth and subtle textural element to your no bake cheesecake cups. Finally, using your mixer on low speed or a silicone spatula, gently fold the whipped cream into the cheesecake filling until just combined. This delicate folding process takes several turns of your rubber spatula and should be done slowly to avoid deflating all the air from the whipped cream. You are aiming for a light, airy, and mousse-like texture.
- You have two great options for transferring the filling onto the crusts. You can use a spoon, or for a neater, more professional look, a piping bag is wonderful. Spoon or pipe about 2 tablespoons of filling over each cooled crust. If using a piping bag, fit it with a large star piping tip or a round piping tip. Then, transfer the creamy filling to the bag and pipe it neatly onto each crust. Alternatively, a plastic zipped-top bag with a snipped corner works just as well. Use the back of a spoon to gently smooth the tops of the no bake cheesecake cups so they are flat and even.
- This is a crucial step for perfectly set no bake cheesecake cups. Refrigerate the mini cheesecakes, still in their muffin pans, for at least 3 hours. They can be refrigerated for up to 2 days. If you are chilling them for longer than 3 hours, I highly recommend covering the pans with aluminum foil or plastic wrap to keep them fresh and prevent any fridge odors from permeating.
- Keep your no bake cheesecake cups refrigerated until you are ready to serve them. They begin to soften and can stick to the liners after about 30 to 60 minutes at room temperature. Serve them with your desired optional toppings for an extra flourish.
- Any leftover mini cheesecakes should be covered and stored in the refrigerator. They will remain fresh and delicious for up to 5 days.