
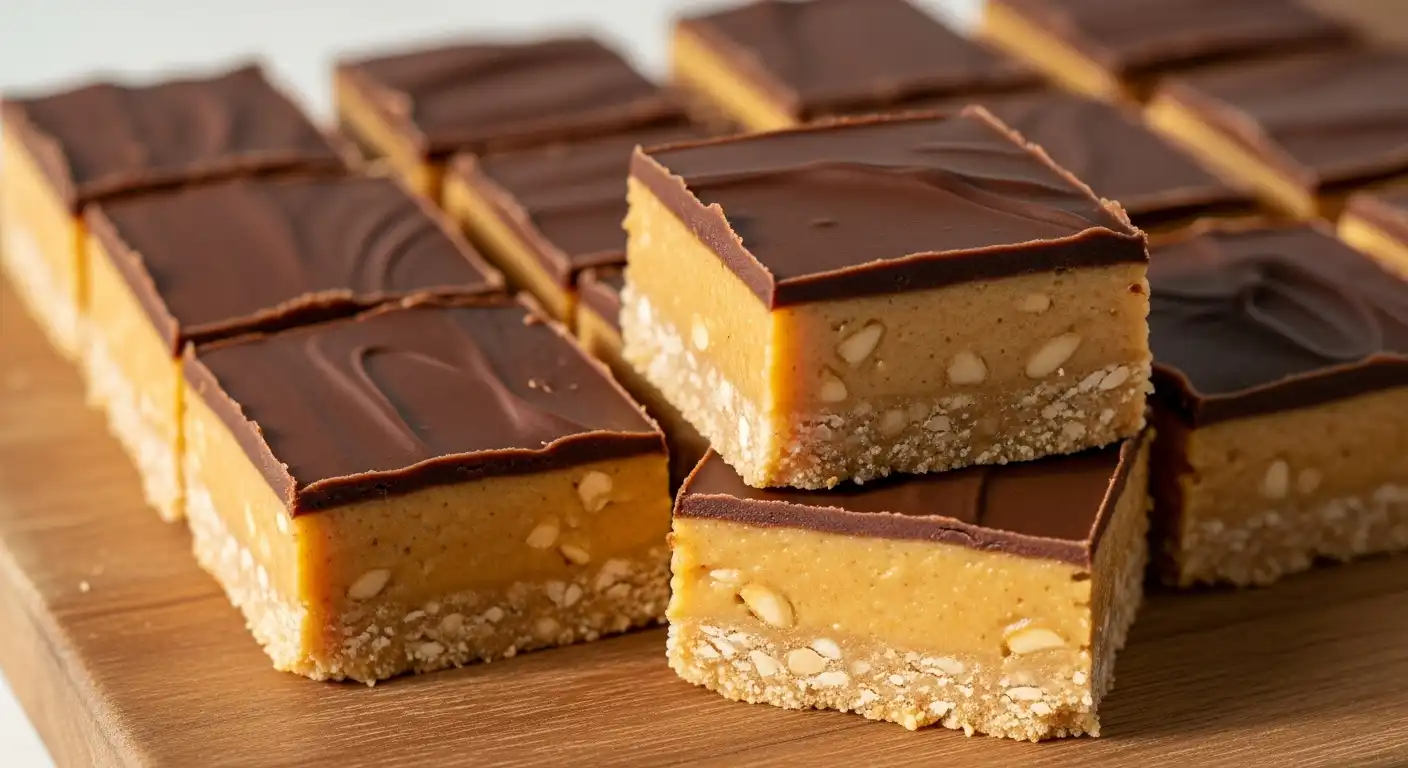
The Ultimate No-Bake Dessert for Any Occasion
Why No-Bake Chocolate Peanut Butter Bars Are a Must-Try
If you’re craving something rich, chocolatey, and deeply satisfying without having to touch your oven, you’re in the right place. No-bake chocolate peanut butter bars are one of those perfect recipes that never go out of style. They come together in minutes, use ingredients you already have, and deliver that sweet-salty combo everyone loves.
This recipe is one I’ve made more times than I can count. It’s one of those go-to treats that works for busy weekdays, lazy weekends, or anytime you need something homemade that feels a little special.
My love for food started in my grandmother’s kitchen. I was the kid who stirred the sauces, sampled everything, and always stood close when the chocolate came out. She kept things simple but always cooked with love. One of the first treats I remember making with her was a tray of no-bake peanut butter bars. That memory stuck with me and inspired the way I cook today.
At Irresistible Meals, my goal is to bring you recipes that are bold in flavor but easy to follow. These bars are exactly that. Whether you’re a beginner or a seasoned home cook, this one is as foolproof as it gets.
If you enjoy easy no-bake treats, you’ll definitely want to try our no-bake pumpkin cheesecake cups. They’re a fall favorite with a creamy twist.
Looking for more kitchen inspiration and real-time recipes? Join us over on Facebook where I share tips, videos, and behind-the-scenes ideas every week.
Table of Contents
Table of Contents
Pantry Staples That Pack a Punch
Print
No-Bake Chocolate Peanut Butter Bars
- Total Time: 2 hours 10 minutes
- Yield: 16 bars 1x
- Diet: Vegetarian
Description
No-bake chocolate peanut butter bars are creamy, chocolatey, and made in minutes with pantry staples. A layered treat that chills to perfection and tastes like homemade candy.
Ingredients
1 cup creamy peanut butter
1/2 cup unsalted butter, melted
2 cups powdered sugar
1 1/2 cups graham cracker crumbs
1 1/2 cups semi-sweet chocolate chips
2 tbsp butter or coconut oil (for melting with chocolate)
1/4 tsp vanilla extract (optional)
Pinch of sea salt (optional for topping)
Instructions
1. Combine peanut butter, melted butter, powdered sugar, and graham cracker crumbs in a bowl.
2. Mix until smooth and press firmly into a parchment-lined 8×8 inch pan.
3. Chill the base for 10 to 15 minutes to firm slightly.
4. Melt chocolate chips with 2 tbsp butter or coconut oil until glossy.
5. Pour chocolate over the peanut butter layer and spread to the edges.
6. Tap the pan gently to level the topping and release air bubbles.
7. Add sea salt, nuts, or sprinkles if desired.
8. Refrigerate for 2 hours or until the chocolate is set.
9. Lift the chilled slab from the pan and cut into squares with a sharp knife warmed under hot water.
Notes
Keep no-bake chocolate peanut butter bars in the fridge for up to 7 days.
Freeze for up to 2 months with parchment paper between layers.
Use crunchy peanut butter for added texture or dairy-free chocolate for a vegan version.
- Prep Time: 10 minutes
- Cook Time: 0 minutes
- Category: Dessert
- Method: No-Bake
- Cuisine: American
Nutrition
- Serving Size: 1 bar
- Calories: 260
- Sugar: 19g
- Sodium: 115mg
- Fat: 16g
- Saturated Fat: 6g
- Unsaturated Fat: 9g
- Trans Fat: 0g
- Carbohydrates: 29g
- Fiber: 2g
- Protein: 5g
- Cholesterol: 12mg
Ingredients You’ll Need for the Best Flavor and Texture
This recipe keeps things simple. You don’t need fancy equipment or special ingredients. Just a handful of pantry staples come together to make something truly irresistible. Each one plays an important role in getting the right texture and that rich, chocolate-peanut butter flavor combo we all crave.
Choosing the Right Peanut Butter
Peanut butter is the star of the show, so getting it right matters. The best type to use is a smooth, shelf-stable peanut butter like Jif or Skippy. These brands have just the right consistency to hold the base together without becoming oily or runny.
Avoid natural peanut butter that separates in the jar. While it’s great for toast or smoothies, the extra oil can make your bars too soft and greasy. If you want a little crunch, you can use crunchy peanut butter, but be aware the texture will be less creamy and more crumbly.
The Chocolate Layer: Chips, Bars, or Ganache
For the topping, melted chocolate brings richness and a firm, glossy finish. Semi-sweet chocolate chips are the most common choice, but you can use dark or milk chocolate depending on your preference.
Here are your options:
- Semi-sweet chocolate chips give that classic, sweet-but-balanced flavor
- Dark chocolate makes it richer and less sweet
- Milk chocolate keeps things soft and mellow
- High-quality chocolate bars can be chopped and melted for a smoother finish
To help the chocolate melt smoothly and slice cleanly, mix in a couple of tablespoons of butter or coconut oil. This gives the topping a softer bite and helps prevent cracking when you cut into it.
Optional Add-Ins for Texture or Flavor
Once you’ve mastered the base recipe, feel free to mix things up. These optional ingredients add texture and give you more control over the flavor:
- Crushed graham crackers add structure and a mild, nutty flavor
- Quick oats bring a little chew and work well in gluten-free versions
- A pinch of sea salt on top creates a salty-sweet finish
- Vanilla extract adds depth and balances the sweetness
- A scoop of protein powder makes the bars more filling, great for post-workout snacks
If you’re experimenting, just be sure to keep the base thick enough to hold its shape. You want it firm but not dry, soft but not sticky.
Foolproof Step-by-Step Instructions
How to Make No-Bake Chocolate Peanut Butter Bars at Home
If you’re looking for the easiest way to make no-bake chocolate peanut butter bars, this is the method that never fails. With a few simple steps and no baking required, you’ll create a rich, layered treat that tastes like it came straight from a bakery.
Build the Peanut Butter Foundation
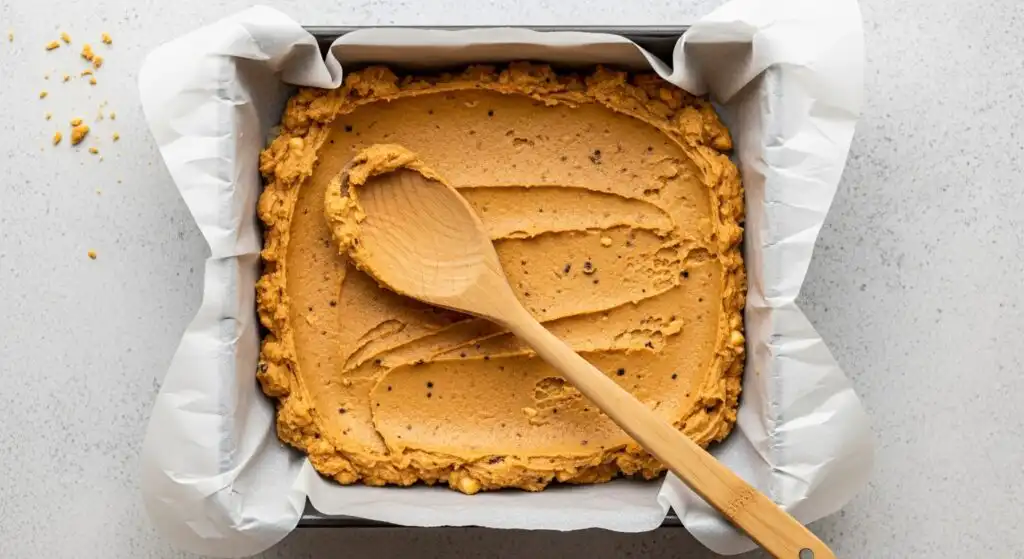
Start by combining creamy peanut butter, melted butter, powdered sugar, and finely crushed graham crackers in a large mixing bowl. Stir until everything blends into a thick, smooth dough. It should feel dense but easy to work with.
If the mixture looks a little dry, add a small spoonful of peanut butter to bring it together. If it seems too sticky, a handful of extra graham cracker crumbs will balance it out.
Press this mixture firmly into the bottom of a parchment-lined square pan. Instead of just flattening it, use your fingers or the bottom of a measuring cup to compact the mixture well into the corners. This gives your no-bake chocolate peanut butter bars a sturdy base that holds up during slicing.
Place the pan in the fridge for 10 to 15 minutes while you move on to the topping.
Create a Smooth Chocolate Finish
In a heatproof bowl, combine chocolate chips with butter or coconut oil. Warm slowly in the microwave or over a double boiler, stirring until glossy and fully melted. The added fat helps the chocolate set with a soft snap instead of cracking.
Pour the melted chocolate over the chilled peanut butter base. Use the back of a spoon to guide the chocolate from edge to edge, letting it cascade into the corners for full coverage. Tap the pan gently on the counter to level the surface and release trapped air bubbles.
This is the time to add any toppings, like a pinch of flaky salt or chopped roasted peanuts.
Cool Down and Cut to Perfection
Slide the pan into the refrigerator and allow your no-bake chocolate peanut butter bars to chill for at least two hours. They should feel firm when touched and have a silky top that doesn’t smudge.
Once fully set, grab the edges of the parchment paper and lift the entire block onto a cutting board. For sharp, bakery-style edges, rinse your knife under hot water, dry it thoroughly with a towel, and slice with slow, steady pressure.
Cut into 16 even bars or smaller bites depending on your serving style. They’re ready to eat immediately or stash in the fridge for later.
No-bake chocolate peanut butter bars are one of those desserts that feel fancy but come together with almost no effort. That’s what makes them a keeper in any kitchen.
Smart Storage and Creative Variations
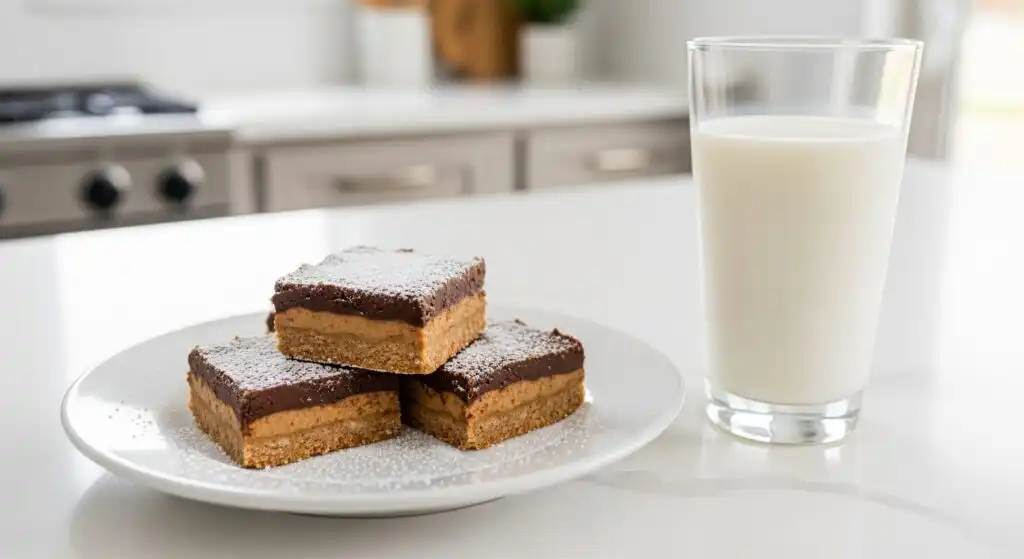
How to Store No-Bake Chocolate Peanut Butter Bars the Right Way
Once you’ve made a batch of no-bake chocolate peanut butter bars, the key to keeping them delicious is storing them properly. With just a little care, you can maintain their creamy texture and rich flavor for days.
After cutting the bars into squares, place them in an airtight container. If stacking, separate layers with parchment paper to prevent sticking. This keeps the chocolate top smooth and the base firm.
No-bake chocolate peanut butter bars do best in the refrigerator. They’ll stay fresh for up to a week without getting soggy or too hard. For longer storage, place them on a tray to freeze until solid, then move them to a freezer-safe bag or container. When you’re ready to enjoy them, leave them on the counter for about 10 minutes. The texture softens perfectly, and the taste is just as rich as day one.
These bars are excellent for meal prep, lunchbox treats, or late-night cravings. Their long shelf life makes them ideal for making ahead without losing quality.
Fun Ways to Customize No-Bake Chocolate Peanut Butter Bars
What makes no-bake chocolate peanut butter bars so versatile is how easily you can tweak the ingredients to suit your preferences. From texture to flavor to dietary swaps, there’s plenty of room to make these your own.
Gluten-free made easy
Instead of traditional graham crackers, use gluten-free cookies or ground oats to form the base. The texture stays dense and chewy, and the flavor still delivers.
Dairy-free and plant-powered
Use a plant-based butter and non-dairy chocolate to keep these bars entirely vegan. When paired with a smooth, shelf-stable peanut butter, they hold their shape perfectly and stay creamy.
Add a little crunch
If you enjoy more texture in your desserts, stir in crushed pretzels, toasted coconut, or chopped nuts. These mix-ins blend well with the peanut butter and add a satisfying bite to every layer.
Try different chocolate flavors
Instead of the usual semi-sweet chips, go bold with bittersweet chocolate or lighten things up with white chocolate. Mixing two kinds together can also create a marbled look and a more balanced sweetness.
Play with bold flavors
Boost the base with a dash of cinnamon, a splash of maple syrup, or a tiny spoonful of espresso powder. You can even layer in cookie butter, caramel, or raspberry jam between the base and chocolate topping for a gourmet twist.
With so many easy adjustments, no-bake chocolate peanut butter bars never get boring. They’re simple to personalize, fun to experiment with, and always a hit with whoever tries them.
Troubleshooting Guide
Common Mistakes When Making No-Bake Chocolate Peanut Butter Bars
Even though no-bake chocolate peanut butter bars are simple to make, a few small mistakes can affect how they look, feel, or taste. If your bars turn out too soft, too hard, or just not quite right, don’t worry. Here’s how to fix the most common issues so your next batch comes out perfect.
Why Did My Bars Turn Out Too Soft or Crumbly
If the base layer falls apart when sliced or feels too loose to hold its shape, the ingredient ratio may be slightly off. These bars rely on the balance of peanut butter, butter, and graham cracker crumbs to stay firm without being dry.
Here’s how to fix it:
- If your base is too soft, add more graham cracker crumbs, one tablespoon at a time, until it holds together
- If it’s dry or crumbling, stir in an extra spoonful of peanut butter and mix thoroughly
Also, make sure the bars are chilled long enough. No-bake chocolate peanut butter bars need at least two hours in the fridge to firm up properly. If the room is warm, keep them refrigerated until just before serving.
Chocolate Layer Cracking or Separating
If your chocolate top breaks apart when you slice the bars, it’s usually because the chocolate was applied too thick or wasn’t mixed with any fat. A thin layer with a touch of butter or coconut oil gives you a smoother finish and a clean cut every time.
Use a hot knife to slice through the chocolate without pressure. Run your knife under warm water, wipe it dry, and press gently through the bars. This gives no-bake chocolate peanut butter bars clean, even edges without cracking the top layer.
Bars Sticking to the Pan or Not Releasing Cleanly
Lining your pan is key. Always use parchment paper with extra overhang along the sides. This lets you lift the full slab of bars from the pan in one clean motion. If you skip this step, the base might stick or crumble when removed.
If the bars have been in the fridge overnight and feel stuck, let them sit at room temperature for 5 minutes. This softens the base just enough to lift without breaking it apart.
With these tips, you can avoid the most common pitfalls and keep your no-bake chocolate peanut butter bars looking and tasting their best from the first bite to the last crumb.
Seasonal Twists and Topping Ideas
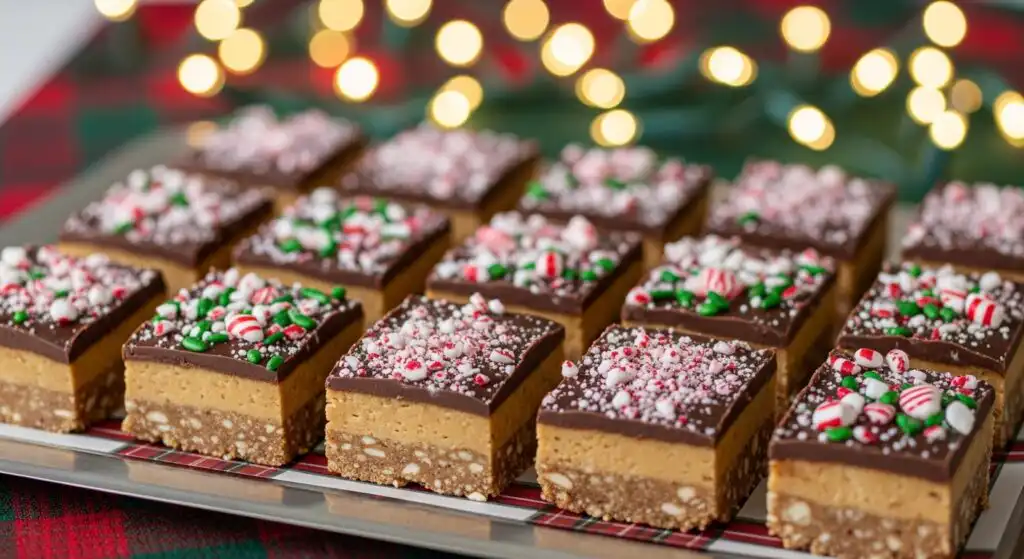
Take Your No-Bake Chocolate Peanut Butter Bars to the Next Level
Once you’ve got the classic version down, no-bake chocolate peanut butter bars open the door to endless flavor possibilities. Whether you’re switching things up for the holidays or adding flair for a themed party, these easy upgrades keep the recipe fresh and fun.
All the ideas below work with the same base, so you get new flavor without changing the simple prep that makes this recipe a favorite.
Creative Flavors That Match the Season
No-bake chocolate peanut butter bars are easy to adjust for holidays, birthdays, or cozy nights at home. These seasonal spins make the recipe feel new every time you make it.
Warm fall flavors
Add pumpkin pie spice to the peanut butter layer and top with crushed cinnamon cookies or chopped pecans. For a richer taste, stir in a spoonful of maple syrup.
Holiday-ready in winter
Sprinkle crushed peppermint on top of the chocolate or swirl in a bit of crushed candy cane before the bars set. You can also mix in a hint of orange zest or cinnamon to the base for a holiday bakery-style flavor.
Light and bright for spring
Use lemon zest, a dash of almond extract, or add a swirl of raspberry preserves. These ingredients brighten up the richness of the chocolate and peanut butter while keeping the bars soft and creamy.
Cool summer twist
Stir in chopped roasted nuts and drizzle caramel over the top while it’s still glossy. Chill the bars extra well before serving so they stay firm in warm weather. They’re a hit at picnics, barbecues, or afternoon snack breaks on hot days.
No matter the season, no-bake chocolate peanut butter bars can match the moment with just a few small changes.
Topping Ideas That Add Crunch and Contrast
What you sprinkle or drizzle on top changes not only the look of your bars, but also the flavor and bite. Here are a few topping combinations that add contrast, texture, or even color:
- Broken pretzel pieces for that satisfying crunch and a hint of salt
- Chopped nuts like almonds or peanuts for an extra layer of richness
- Mini chocolate candies or crushed toffee for texture and fun color
- Toasted coconut for a slightly nutty, golden finish
- A swirl of melted white chocolate adds a creamy sweetness
- Coarse sea salt flakes bring out the peanut butter flavor with a bold finish
- Crushed cornflakes or granola for an unexpected crispy texture
Each of these options blends beautifully with the chocolate topping and gives your no-bake chocolate peanut butter bars a custom feel. It’s an easy way to make each batch feel new, even if you’ve made them a dozen times.
Frequently Asked Questions About No-Bake Chocolate Peanut Butter Bars
How long do no-bake chocolate peanut butter bars last in the fridge?
These bars will stay fresh in the refrigerator for up to one week when stored in an airtight container. For best results, keep them cold until just before serving. This helps the chocolate stay firm and the base keep its shape.
If you plan to enjoy them over a longer period, freezing is a great option. Just thaw them at room temperature for 10 to 15 minutes before eating.
Can I freeze chocolate peanut butter bars without ruining the texture?
Yes, freezing works very well. Cut the bars first, then arrange them in a single layer on a tray. Once frozen solid, move them to a freezer-safe bag or sealed container. The texture stays creamy and the chocolate topping remains smooth. Just avoid stacking them without parchment paper in between.
This no-bake treat can last up to two months in the freezer without any flavor loss.
Do I have to use graham crackers for the base?
Not at all. While graham crackers are traditional, there are plenty of alternatives. Crushed digestive biscuits, vanilla wafers, or even oats can work as a substitute. If you need a gluten-free option, use certified gluten-free graham crackers or ground nuts for a firmer base.
Each one gives the bars a slightly different texture but still holds together beautifully.
Can I make these bars dairy-free or vegan?
Absolutely. Swap the butter for a plant-based version, and choose dairy-free chocolate chips. Many store-bought peanut butters are already vegan-friendly, so it’s an easy switch. With these simple substitutions, you’ll have a dairy-free version of this classic dessert without sacrificing taste or structure.
Why is my chocolate layer cracking when I cut the bars?
This usually happens when the topping is too firm or applied too thickly. To avoid cracks, mix in a spoonful of butter or coconut oil when melting the chocolate. Use a warm knife to slice cleanly through the topping without breaking it. If the bars are too cold, let them sit for a few minutes at room temperature before cutting.