
As a professional chef and someone who loves to entertain, I know the joy of a truly crowd-pleasing appetizer. These BBQ chicken sliders are a game-day staple in my kitchen, perfect for potlucks, or even an easy weeknight meal (and they make a fantastic quick and easy lunch the next day!). But let’s be honest, the biggest pitfall with sliders is often a soggy bun, turning a delicious bite into a disappointment. Fear not, because I’ve perfected an easy recipe that solves this common problem, guaranteeing crispy, never-soggy bottoms. Get ready to master the best, most reliable BBQ chicken sliders you’ve ever made.
Table of Contents
Table of Contents
Why You’ll Love These BBQ Chicken Sliders (No More Soggy Buns!)
I used to dread the dreaded soggy bottom bun when making BBQ chicken sliders, a common mistake that ruins the texture. But I found a brilliant solution to prevent those slimy and goopy buns! My unique twist involves brushing the inside surfaces of both the top and bottom slider buns with a mixture of melted unsalted butter and a pinch of garlic powder. The magic happens when you lightly pre-toast the bottom buns in the oven for 3-5 minutes until they are slightly golden and firm.
This simple step creates an incredible moisture barrier. The pre-toasting helps to dry out the bread just enough, and the butter-garlic mixture then seals it, preventing the saucy BBQ chicken from soaking in and turning the bun into a mushy mess. This isn’t just about preventing sogginess; it’s about texture improvement and flavor enhancement. The garlic butter adds a rich, savory note that complements the sweet BBQ sauce and melty cheese beautifully, creating a golden, savory, sweet, and juicy bite every time. You’ll get perfectly crispy buns from start to finish. This 30 minute recipe is largely a one-pan meal, making it an easy recipe and a stress-free, crowd-pleasing choice ideal for any game day appetizer or potluck food.
Ingredients Needed for Your Perfect Sliders
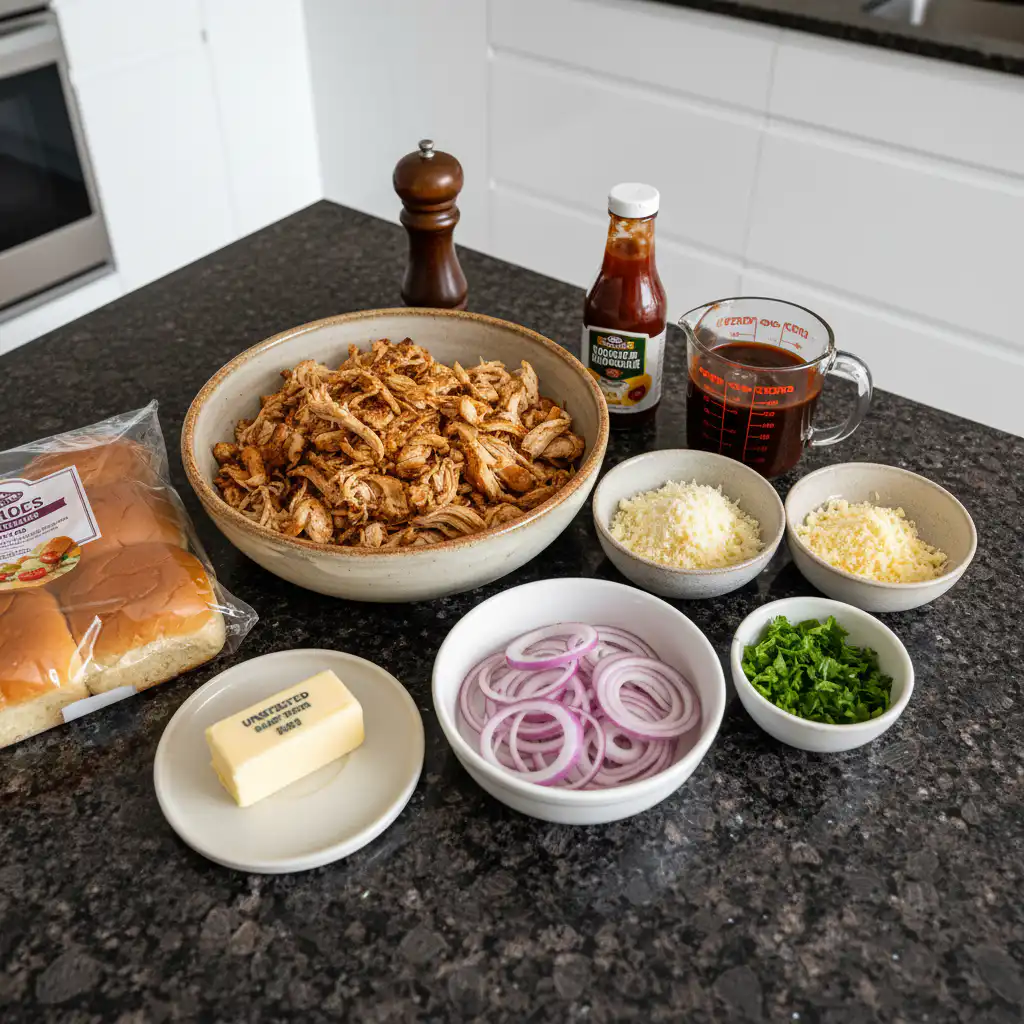
Here’s what you’ll need to make these irresistible sliders:
- 12 slider buns, split
- 4 cups cooked chicken, shredded*
- 1 cup BBQ sauce (I used Sweet Baby Rays), more if desired.
- 1/4 red onion, thinly sliced
- 1 cup mozzarella, grated
- 1/2 cup smoked gouda, grated
- 2 tablespoons fresh cilantro leaves, roughly chopped
- 2 tablespoons unsalted butter
- Fresh ground black pepper as desired
Ingredient Notes & Smart Substitutions
When it comes to mastering the ingredients, a few choices can elevate your BBQ chicken sliders.
For your slider buns, I find that Hawaiian rolls offer a wonderful sweetness, but potato buns or brioche also work beautifully. The key is that a slightly denser bun helps create a better moisture barrier, especially with our unique toasting trick.
For the cooked chicken, speed is often king. Rotisserie chicken is my go-to for quick prep. You can also use leftover roasted chicken (such as extra baked chicken for tacos), or quickly pan-cook 3 boneless, skinless chicken breasts, then shred them while warm for efficiency.
Regarding BBQ sauce, Sweet Baby Rays is a classic for its balanced flavor, but don’t hesitate to experiment! A spicier, smokier, or tangier BBQ sauce can totally change the profile of these sliders.
The cheese blend is crucial for flavor and melt. Mozzarella cheese provides that satisfying pull and melty texture, while smoked gouda cheese adds a deep, smoky complexity. For a spicier kick, consider swapping the gouda for pepper jack cheese.
Red onion and fresh cilantro are essential flavor enhancers. The red onion offers a sharp contrast to the sweet sauce, and fresh cilantro brightens everything up.
Finally, the unsalted butter is vital for our bun twist, creating that golden crispness and a delicious flavor enhancement. Don’t forget that pinch of garlic powder to mix in with it for extra savory goodness.
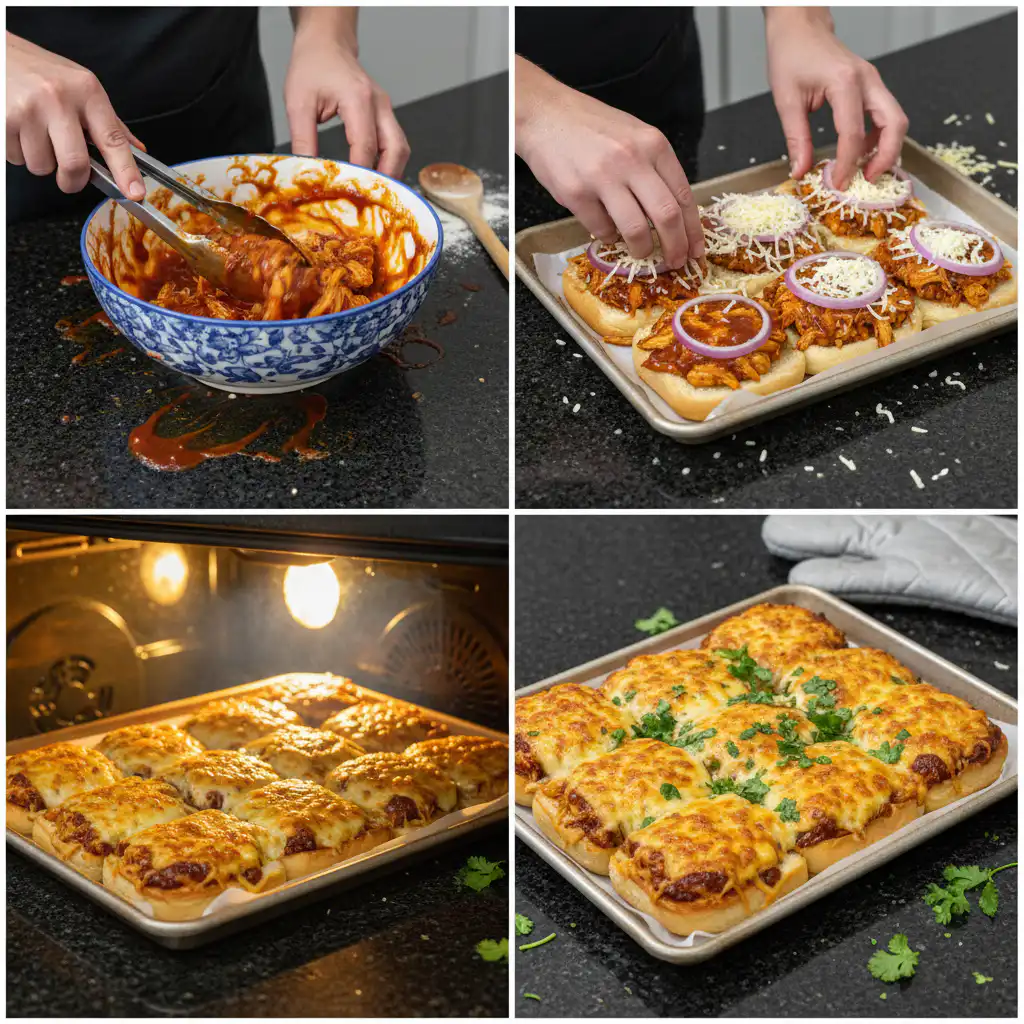
How to Make BBQ Chicken Sliders (Step-by-Step with Our Crispy Bun Trick)
Get ready to assemble these delicious BBQ chicken sliders with my crispy bun trick. This is largely a one-pan meal, perfect for an easy cleanup.
Prepare Your Pan and Buns
1. Preheat your oven to 350˚F. Prepare a 9X13 baking dish with parchment paper, lightly spraying the paper with non-stick cooking spray for extra insurance against sticking.
2. Place the bottom halves of your slider buns in the prepared baking dish.
3. Now for the secret to no more soggy bottom buns: Melt 1 tablespoon of the unsalted butter. Stir in a pinch of garlic powder. Brush the inside surfaces of these bottom buns generously with the melted garlic butter. Pop the dish into the preheated oven and lightly toast for 3-5 minutes, just until the buns are slightly golden and firm to the touch. This creates a crucial moisture barrier. Remove them from the oven.
Assemble the Sliders
Step 4: In a small bowl, mix the shredded chicken with 1/2 cup BBQ sauce until fully coated. Spread the mixture evenly over the toasted bottom buns.
Step 5: Drizzle the remaining BBQ sauce evenly over the chicken layer.
Step 6: Sprinkle mozzarella, smoked gouda, and sliced red onion over the chicken. Add fresh cilantro and a pinch of black pepper if desired.
Step 7: Brush the inside of the top buns with the remaining garlic butter. Place them gently over the sliders to finish assembling.
Bake to Golden Perfection
Step 8: Cover the baking dish tightly with foil and bake for 15 minutes. This helps the cheese melt evenly while keeping the tops from browning too quickly.
Step 9: While the sliders bake, melt the remaining butter if needed. Stir in the fresh cilantro and set aside.
Step 10: Remove the foil and brush the tops with the cilantro butter. Return to the oven uncovered and bake for 10 more minutes, until golden brown and bubbly.
Step 11: Serve warm while the cheese is perfectly melted.
Master Your Meal Prep: Make-Ahead, Freezing & Reheating Sliders
These BBQ chicken sliders are fantastic for meal prep, allowing you to enjoy them fresh or save them for later.
Make-Ahead Strategies
You can prepare the chicken filling and cheese mixture up to 24 hours in advance. Simply shred your cooked chicken, mix it with the BBQ sauce, and grate your cheeses. Store the chicken mixture and the cheese/onion/cilantro blend in separate airtight containers in the refrigerator. This way, you can quickly assemble and bake the sliders just before serving for the freshest results.
For partially assembled sliders, you can prepare them up to the point of placing the top buns on, then cover the baking dish tightly with aluminum foil and refrigerate for up to 12-24 hours. When ready to bake, proceed with step 8, adding a few extra minutes to the initial covered baking time if coming straight from the fridge.
Freezing Instructions
If you have leftover sliders or want to prep a batch for future enjoyment, freezing is a great option. Allow the already baked and cooled sliders to come to room temperature. Individually wrap each slider tightly in plastic wrap, then place them in an airtight freezer-safe container or a heavy-duty freezer bag. They will keep well in the freezer for up to 1-2 months.
Reheating for Optimal Freshness
The best way to reheat BBQ chicken sliders for optimal freshness and texture is in the oven. From the refrigerator, place them on a baking sheet, cover loosely with foil, and bake at 300°F (150°C) for 10-15 minutes, or until heated through. From frozen, you can bake them covered in foil at 325°F (160°C) for 20-30 minutes, then uncover for the last 5 minutes to crisp the tops. Be cautious with microwave reheating, as it can lead to soggy buns and dry chicken. Always ensure sliders are heated to an internal temperature of 165°F (74°C) for food safety. Generally, sliders should not sit out at room temperature for more than two hours.
Pro Tips & Common Mistakes to Avoid for Perfect Sliders
Achieving the perfect BBQ chicken sliders is all about attention to detail.
Pro Tips for Success
For perfectly shredded chicken, use two forks while the chicken is still warm. If you’re making a larger batch, a stand mixer with a paddle attachment can shred it in seconds.
Keep a good chicken-to-sauce balance so the mixture stays juicy without becoming too runny. You can always add extra BBQ sauce when serving.
For the best texture, lightly butter and toast the buns before assembling. This simple step creates a barrier that prevents soggy bottoms.
To melt the cheese evenly, cover the sliders with foil at first. Then remove the foil near the end to let the tops turn golden.
This recipe is great for batch cooking and perfect for feeding a crowd. It can also be made as a simple one-pan meal, saving you time in the kitchen.
Common Mistakes to Avoid
The most common mistake is not preventing soggy bottom buns. Skipping the toasting and buttering steps will lead to slimy and goopy buns, a texture nobody wants. Our unique bun preparation is key to avoiding this. Another pitfall is dry chicken. This usually happens from overbaking or not having enough BBQ sauce to keep the chicken moist. Follow the oven baking times closely. Overcrowding the pan can lead to uneven cooking and less crispy tops. Give your sliders a little space. Finally, rushing assembly can mean uneven distribution of ingredients. Take your time to properly mix the chicken and sauce and evenly distribute the cheese and toppings for the best flavor in every bite.
Serving Suggestions & Smart Storage
These BBQ chicken sliders are incredibly versatile and perfect for any casual gathering.
Serving Ideas
BBQ chicken sliders are my absolute favorite for a game day appetizer, potluck food, or even as an easy recipe for a fun family dinner. For classic side dishes, I love serving them with a creamy cheddar broccoli soup, a fresh coleslaw, a hearty potato salad, a simple green salad, or corn on the cob. For creative garnishes, a sprinkle of extra fresh cilantro or a thin slice of red onion adds a pop of color and flavor. A small bowl of extra BBQ sauce on the side is always a hit for those who like more sauciness. For beverage pairings, a cold beer, iced tea, or lemonade are perfect complements to the savory-sweet flavors.
Storage and Make-Ahead Tips
For leftover storage, allow any baked and cooled sliders to cool completely. Store them in an airtight container in the refrigerator for 3-4 days. For longer storage, refer to the detailed freezing instructions in the “Master Your Meal Prep” section above. Always remember food safety guidelines: do not leave sliders out at room temperature for more than two hours.
Conclusion: Your Go-To BBQ Chicken Sliders Recipe
I truly believe this is your new go-to BBQ chicken sliders recipe. It’s not just easy and incredibly delicious; it’s reliably perfect every time. My unique twist of buttering and pre-toasting the buns means you’ll never suffer from soggy bottom buns again, ensuring a superior texture and taste from start to finish. I encourage you to try this recipe for your next game day appetizer, potluck food, or a quick, satisfying family meal. I promise you’ll love the results. If you try it, I’d love to hear your thoughts and see your creations! Feel free to explore other sandwich recipe ideas like our chickpea salad sandwiches here on my site.
FAQ: Your Top BBQ Chicken Slider Questions Answered
How do you prevent soggy bottoms on BBQ chicken sliders?
The key is my unique twist: brush the inside of both the top and bottom slider buns with melted butter and garlic powder. Then, lightly pre-toast the bottom buns in the oven for 3-5 minutes until slightly golden. This creates an effective moisture barrier, preventing the saucy chicken from making the buns soggy.
What are the best types of cooked chicken and BBQ sauce for sliders?
For cooked chicken, rotisserie chicken is ideal for speed and convenience. Leftover roasted chicken also works great. For BBQ sauce, I love Sweet Baby Rays for its balanced flavor, but feel free to experiment with your favorite spicy, smoky, or tangy BBQ sauce varieties.
Can I make these BBQ chicken sliders ahead of time and how do I store them?
Yes, you can! Prepare the shredded chicken and BBQ sauce mixture, and grate the cheeses, storing them separately in airtight containers in the refrigerator for up to 24 hours. For baked leftovers, store them in an airtight container in the refrigerator for 3-4 days. For longer storage, you can freeze individual baked and cooled sliders for 1-2 months. Reheat in the oven for best results.
What are some popular variations for BBQ chicken sliders?
You can easily customize these sliders. For a spicier kick, use pepper jack cheese instead of gouda. Experiment with different BBQ sauce flavors, from a smoky mesquite to a zesty Carolina gold. You could also add a slice of pickle inside for an extra crunch.
What sides pair well with BBQ chicken sliders for a game day or potluck?
Classic side dishes like coleslaw, potato salad, a simple green salad, or corn on the cob pair wonderfully. For a heartier meal, a bowl of cheddar broccoli soup is also a great accompaniment.
What is the quickest way to shred cooked chicken?
The quickest way to shred cooked chicken, especially if it’s still warm, is to place it in a stand mixer with the paddle attachment and mix on low speed for about 30 seconds. Alternatively, using two forks to pull the chicken apart is also very efficient.
What kind of buns are best for sliders?
I recommend Hawaiian rolls for their sweetness, or potato buns or brioche for a slightly richer flavor and texture. A slightly denser bun helps prevent sogginess, especially when combined with our bun toasting method for an improved texture.
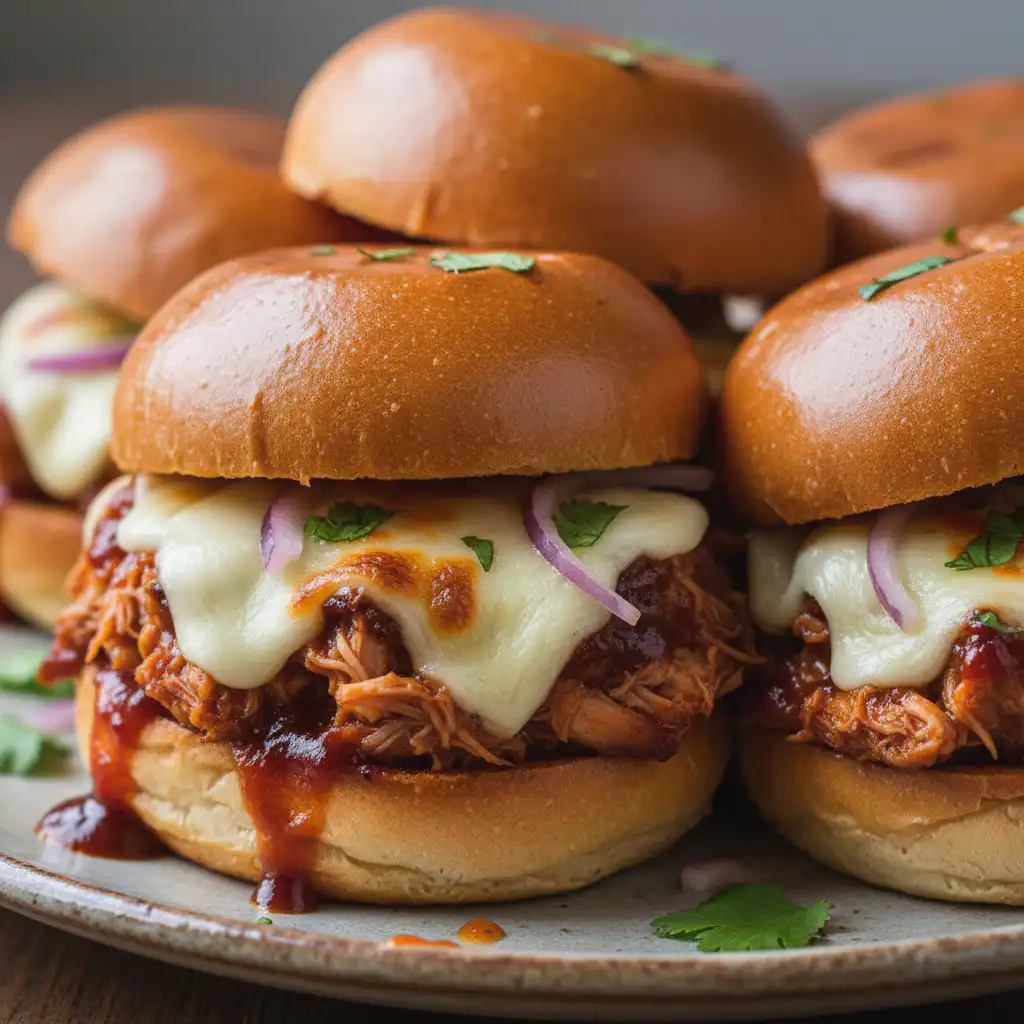
Ultimate BBQ Chicken Sliders: Your New Game Day Favorite
Ingredients
Equipment
Method
- Preheat your oven to 350˚F. Prepare a 9X13 baking dish with parchment paper, lightly spraying the paper with non-stick cooking spray for extra insurance against sticking.
- Place the bottom halves of your slider buns in the prepared baking dish.
- Now for the secret to no more soggy bottom buns: Melt 1 tablespoon of the unsalted butter. Stir in a pinch of garlic powder. Brush the inside surfaces of these bottom buns generously with the melted garlic butter. Pop the dish into the preheated oven and lightly toast for 3-5 minutes, just until the buns are slightly golden and firm to the touch. This creates a crucial moisture barrier. Remove them from the oven.
- In a small bowl, combine your shredded chicken with 1/2 cup of the BBQ sauce. Mix until the chicken is completely coated and glistening with sauce. Evenly spread this flavorful chicken mixture across the toasted bottom buns.
- Drizzle the remaining 1/2 cup of BBQ sauce over the chicken-topped sliders.
- Evenly sprinkle the mozzarella cheese, thinly sliced red onion, smoked gouda cheese, and 1 tablespoon of the fresh cilantro across the chicken. Add fresh ground black pepper as desired.
- Take the top buns and, using the remaining melted garlic butter mixture, brush the inside surfaces. This ensures both top and bottom buns benefit from our texture improvement. Place the buttered top buns on top of your assembled sliders.
- Cover the baking dish tightly with aluminum foil and bake for 15 minutes. This allows the cheese to melt beautifully and the flavors to meld without the tops browning too quickly.
- While the sliders are baking, if you need more melted butter, melt the remaining 1 tablespoon of unsalted butter and stir in the remaining fresh cilantro (or if you already have enough from the initial melted butter, simply stir in the cilantro now). Set this aside.
- Remove the foil from the pan. Brush each top bun generously with the cilantro-butter mixture. Return the dish to the oven, uncovered, and bake for another ten minutes, or until the tops are golden brown and the cheese is bubbly and gooey.
- Serve immediately while warm and melty.