
There is nothing quite like a perfectly creamy no-bake cheesecake to satisfy a sweet craving, especially when you need a showstopping dessert without turning on the oven. I know many home cooks have faced the disappointment of a runny no-bake cheesecake, but I am thrilled to share my fail-proof recipe that guarantees firm, stable slices every single time. This easy no bake cheesecake is perfect for home cooks of all levels, offering both convenience and a superior texture that is simply irresistible.
Table of Contents
Table of Contents
Why You’ll Love This Recipe
I am so excited for you to try this recipe, because it solves the age-old problem of a no-bake cheesecake that just will not set. My unique twist is a small but mighty addition: a mere teaspoon of bloomed gelatin. This secret ingredient is a game-changer for achieving a consistently firm, stable cheesecake that holds its shape beautifully. It guarantees you will get clean slices, which is wonderful for presentation and reduces any stress in the kitchen, especially if you are less experienced or baking in warmer climates.
Beyond its incredible stability, this no-bake cheesecake offers a luxurious experience. You will find a creamy, light, sweet-tangy, and velvet-rich texture that truly melts in your mouth. The preparation is quick, requiring no oven, making it ideal for make-ahead convenience, perfect for entertaining, and a fantastic family-friendly dessert.
Ingredients Needed
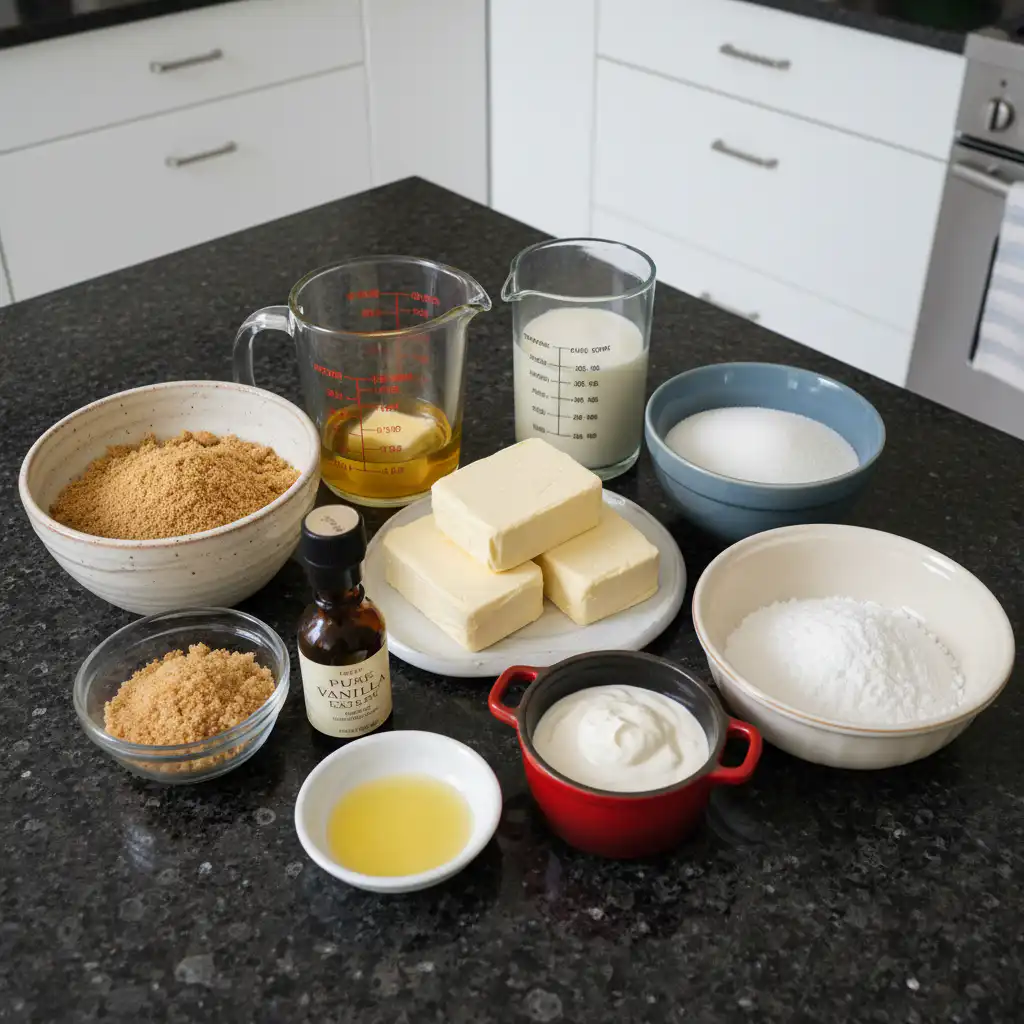
- 2 cups (240g) graham cracker crumbs (about 16 full sheet graham crackers)
- 1/3 cup (67g) packed light or dark brown sugar
- 1/2 cup (8 Tbsp; 113g) unsalted butter, melted
- 1 and 1/4 cups (300ml) heavy cream or heavy whipping cream
- 24 ounces (678g) full-fat brick cream cheese, softened to room temperature
- 1/2 cup (100g) granulated sugar
- 2 Tablespoons (15g) confectioners’ sugar
- 1/4 cup (60g) sour cream, at room temperature
- 2 teaspoons lemon juice
- 1 teaspoon pure vanilla extract
- 1 teaspoon bloomed gelatin (dissolved in 2 tablespoons of hot water)
Ingredient Notes & Substitutions
When it comes to cream cheese, I always emphasize using full-fat brick cream cheese, not the whipped or spreadable kind in a tub—a rule that also applies perfectly when whipping up a banana cake with cream cheese frosting. Brands like Philadelphia cream cheese are excellent choices in the US. Ensuring your cream cheese is softened to room temperature is absolutely critical; this prevents any lumps from forming in your luscious cheesecake filling. Cold cream cheese will inevitably lead to a lumpy texture.
Heavy cream, sometimes called heavy whipping cream, plays a vital role in the structure of our no-bake cheesecake. Its high-fat content is what allows it to whip into stiff peaks, providing the necessary aeration and body for a light yet stable filling. Look for cream with at least 36% milk fat for the best results.
For the graham cracker crust, we are using graham cracker crumbs, which are finely crushed graham crackers common in US baking. If you are not in the US, digestive biscuits are a popular substitute. To make your own crumbs, simply pulse whole graham crackers in a food processor until fine. For crust alternatives, you can easily make this a gluten-free crust by using gluten-free graham crackers. Other delicious options include crushed Oreos for a chocolate crust, shortbread cookies, or even nut-based crusts made with finely ground almonds or pecans. Mastering the crust is all about tight packing and the right butter ratio.
The bloomed gelatin is our unique twist and your secret weapon in this no-bake cheesecake recipe. This small amount of gelatin, dissolved in hot water, provides crucial structural integrity to the filling. It helps the cheesecake set firmly and reliably without altering the classic creamy, light no-bake texture. This is a bit of food science magic that guarantees a perfect slice every time.
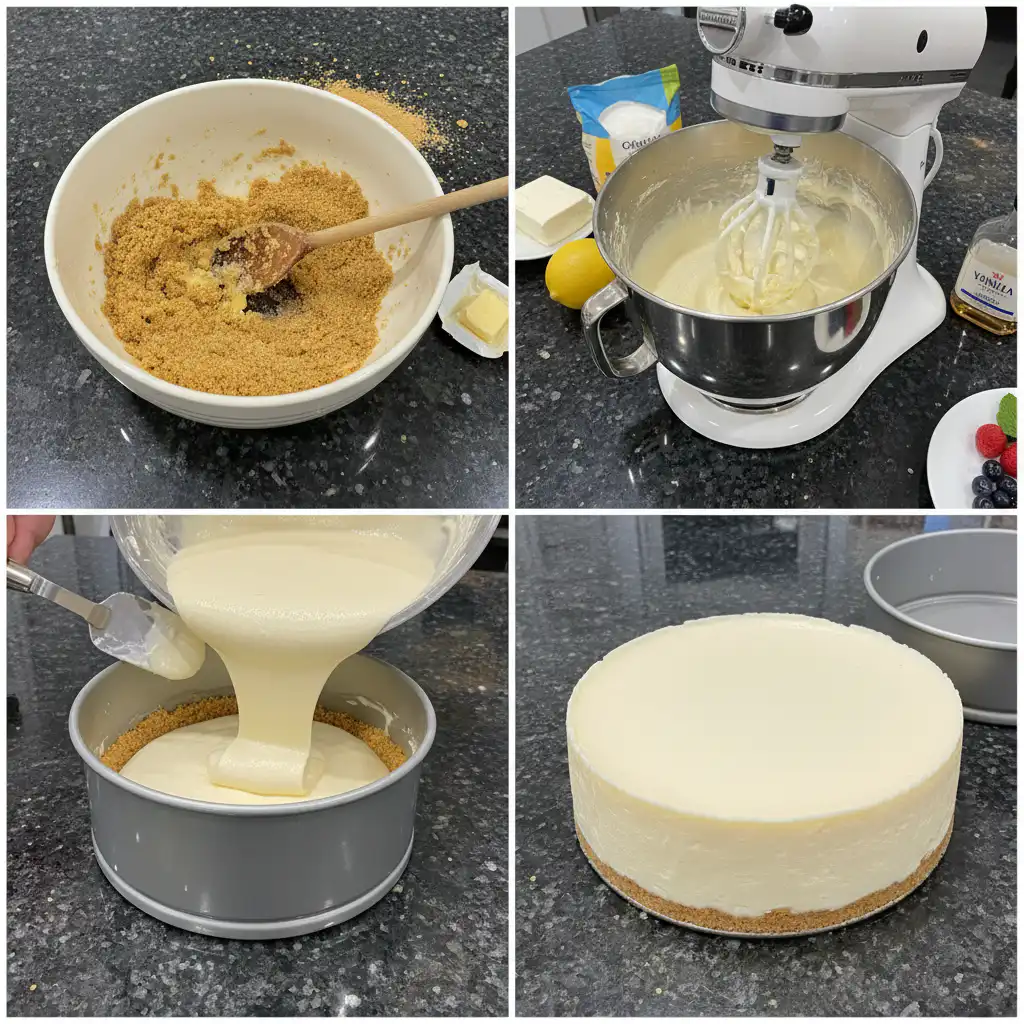
How to Make No-Bake Cheesecake
Step-by-Step Instructions:
Step 1: Prepare the Graham Cracker Crust
In a medium bowl, mix graham cracker crumbs, brown sugar, and melted butter until it resembles wet sand. Press the mixture firmly into a 9- or 10-inch springform pan, covering the bottom and slightly up the sides. Use a flat measuring cup to pack it tightly so the crust holds together when sliced. Freeze for 10–20 minutes while preparing the filling.
Step 2: Whip the Heavy Cream
In a large bowl, whip cold heavy cream on medium-high speed for 4–5 minutes until stiff peaks form. The cream should hold its shape without drooping. Avoid over-whipping, as it can become grainy. Set aside.
Step 3: Create the Cream Cheese Base
In a large bowl, beat the room temperature cream cheese and granulated sugar until smooth and creamy. Scrape down the sides as needed. Add confectioners’ sugar, sour cream, lemon juice, and vanilla extract, then beat again for 2–3 minutes until fully combined. Make sure the mixture is completely smooth with no lumps for the best texture.
Step 4: Incorporate the Gelatin
Stir the bloomed gelatin (1 teaspoon dissolved in 2 tablespoons hot water) into the cream cheese mixture. Mix thoroughly until fully incorporated. This step helps the cheesecake set firmly and improves the overall texture.
Step 5: Fold in the Whipped Cream
Gently fold the whipped cream into the cheesecake filling using a spatula or mixer on low speed. Work slowly to keep the mixture light and airy. Avoid overmixing to maintain a smooth, mousse-like texture.
Step 6: Assemble and Chill
Remove the crust from the freezer and spoon the filling evenly into it. Smooth the top with a spatula. Cover tightly and refrigerate for at least 6–8 hours. For best results, chill overnight to ensure a firm set and clean slices.
Step 7: Slice and Serve
Once fully chilled, loosen the cheesecake from the pan before removing the ring. Slice with a clean, sharp knife, wiping the blade between cuts for neat results. Serve with your favorite toppings.
Perfecting Your No-Bake Cheesecake: Troubleshooting & Adaptations
Troubleshooting Common Issues
If your crust is too hard, you might have over-packed it or added too much melted butter. For a softer crust, ensure your butter ratio is correct and pack it firmly but not excessively. If your crust is too soft or crumbly, it might not have been packed tightly enough, or the butter was not evenly distributed. Always pack extra tightly with the bottom of a measuring cup to prevent crumbling.
While our unique gelatin twist significantly reduces the risk of a runny filling, other factors can still contribute. Always ensure you are using full-fat brick cream cheese, as lower-fat versions contain more water and will not set as firmly. Equally important is whipping your heavy cream to stiff peaks. If the cream is not whipped enough, it will not provide the necessary structure, resulting in a softer filling. Understanding this food science helps achieve a perfectly set no bake cheesecake.
A lumpy filling is almost always due to cold cream cheese. Reiterate the importance of using room temperature cream cheese. If your cream cheese is not soft enough, it will resist blending smoothly with the sugar, leading to lumps. Thoroughly beat the cream cheese and granulated sugar together until it is absolutely smooth and creamy before adding any other liquids.
Pan Size & Recipe Adaptations
This recipe is designed for a 9-inch or 10-inch springform pan. If you want to adapt it for a smaller 8-inch springform pan, you can typically use about 2/3 of the crust and filling ingredients. For a larger pan, you might need to increase the recipe by about 1.5 times. When adapting for a pie dish, remember that the crust will only go on the bottom, so adjust crumb and butter quantities accordingly. Pay attention to the filling thickness; a thinner cheesecake might chill faster.
Converting this recipe into delightful mini cheesecakes is incredibly easy and a popular variation, much like our favorite no-bake pumpkin cheesecake cups. Line a muffin tin with paper liners. For the crust, use about 1-2 tablespoons of the graham cracker mixture per liner, packing it down. For the filling, spoon or pipe the cheesecake mixture into each liner. The chilling time for mini cheesecakes is usually shorter, around 3-4 hours, but overnight is still ideal for the firmest set.
Pro Tips & Common Mistakes to Avoid
Pro Tips for Success
The bloomed gelatin truly is your secret weapon for this no bake cheesecake. It is the key to achieving that perfect, firm, and beautifully sliceable texture. This is especially useful for make-ahead desserts or if you are serving in warmer environments, enhancing the inherent stability of this no-bake cheesecake recipe.
Achieving stiff peaks for your heavy cream is fundamental. The cream should hold its shape firmly when you lift the whisk, creating a peak that stands straight up without collapsing or looking dry and crumbly. This perfectly whipped heavy cream gives your cheesecake its signature light and airy cheesecake mousse texture.
Always use room temperature cream cheese and sour cream. This ensures your ingredients blend together seamlessly, guaranteeing a silky-smooth, lump-free filling without any resistance or unwanted texture.
Pack that graham cracker crust tightly. Using the bottom of a measuring cup to firmly press the crumbs into the springform pan is crucial. This step prevents the crust from crumbling and falling apart when you go to slice your beautiful dessert.
Master the gentle folding technique when incorporating the whipped cream into the cream cheese mixture. This preserves the air you whipped into the cream, which is vital for maintaining the signature light and airy texture of your no bake cheesecake.
Chill time is crucial for the best set. I cannot stress this enough: a minimum of 12 hours of refrigerating is vital for the no bake cheesecake to firm up properly, leading to the best set and neatest, most elegant slices.
For clean slices and a professional presentation, always wipe your knife clean with a warm, damp cloth between each cut. This simple trick makes all the difference in how your cheesecake looks on the plate.
Common Mistakes to Avoid
Skipping the gelatin is a common mistake that can lead to disappointment. While some no-bake recipes rely solely on whipped cream for setting, the gelatin in this recipe contributes significantly to its reliability and superior firm set, ensuring your cheesecake holds its shape beautifully.
Not whipping cream enough is a top reason for a runny no-bake cheesecake filling. If your heavy cream does not reach stiff peaks, it will not provide enough structure, resulting in a soft, unset filling.
Using cold cream cheese is almost a guarantee for a lumpy filling. Cold cream cheese does not incorporate smoothly with sugar and other ingredients, leaving unsightly lumps in your otherwise smooth cheesecake. Always plan ahead to let it soften.
While tempting, freezing the cheesecake specifically to set it is not recommended. Rapid freezing can negatively impact the final texture of the delicate filling, making it less creamy and potentially icy.
Overmixing the filling after you have folded in the whipped cream can deflate the air. This results in a dense cheesecake that lacks the light and airy quality you are aiming for, so be gentle and stop mixing once just combined.
Serving & Storage
Serving Ideas
My no bake cheesecake is fantastic on its own, but it truly shines with a variety of classic toppings. Fresh berries are always a winner, whether it is a simple scattering of raspberries, blueberries, or a vibrant homemade strawberry sauce. Other delightful options include a dollop of extra whipped cream, a bright lemon curd, or a decadent salted caramel drizzle. You can also add some lemon zest for a brighter, more lemon-flavored cheesecake or incorporate chocolate shavings.
For special occasions, garnishing with a few fresh mint leaves or edible flowers elevates the presentation. I find that this no-bake cheesecake is best served chilled, straight from the refrigerator, ensuring its optimal firm texture and refreshing taste.
Storage and Make-Ahead
This no-bake cheesecake is an excellent make-ahead dessert, which makes it perfect for parties or holidays, especially when paired with other quick treats like no-bake chocolate peanut butter bars. Once covered tightly with plastic wrap or aluminum foil, it can be stored in the refrigerator for up to 5 days, maintaining its freshness and flavor.
For longer storage, you can freeze the no-bake cheesecake. To do this, ensure it is thoroughly chilled and set. Remove it from the springform pan, place it on a cardboard cake round, and wrap it tightly in several layers of plastic wrap, followed by a layer of aluminum foil. It can be frozen for up to 1 month. To thaw, simply transfer it to the refrigerator overnight. While freezing is a great option, do note that the texture might slightly change compared to a freshly chilled cheesecake.
Nutrition Information
Please note that specific nutrition information (calories, macros per serving) is not provided in this recipe. If you require this information, I recommend using an online nutrition calculator with the exact ingredients and serving size you plan to use.
Conclusion
I am confident that this no-bake cheesecake recipe will become a new favorite in your kitchen. Its exceptional creaminess, ease of preparation, and the guaranteed stability thanks to our unique gelatin twist mean you can achieve bakery-quality results right at home. Say goodbye to runny cheesecakes and hello to perfectly firm, smooth slices every time. I encourage you to try this recipe, experiment with your favorite toppings, and share your delicious creations. Happy baking, or should I say, happy no-baking!
FAQ (Frequently Asked Questions)
What is the difference between baked and no-bake cheesecake?
The main difference lies in how they set. Baked cheesecakes rely on eggs and gentle baking in the oven to achieve a dense, custard-like texture. No-bake cheesecakes, like this one, use stabilizers such as whipped heavy cream or, in our case, a small amount of bloomed gelatin to set in the refrigerator, resulting in a lighter, often mousse-like texture without needing an oven.
How do you ensure no-bake cheesecake sets firmly?
To ensure a firm set, it is crucial to use full-fat brick cream cheese, whip your heavy cream to stiff peaks, and especially, incorporate our unique addition of bloomed gelatin. This combination provides guaranteed stability. Additionally, sufficient chilling time in the refrigerator, ideally 12 hours or overnight, is absolutely essential for the best results.
Can I make this no-bake cheesecake ahead of time or freeze it?
Absolutely, this no-bake cheesecake is an excellent make-ahead dessert; it actually benefits from an overnight chill. For longer storage, you can freeze it by wrapping it tightly in plastic wrap and foil. To thaw, simply transfer it to the refrigerator overnight. While it freezes well, you might notice a very slight change in texture compared to freshly chilled.
What are the best toppings for no-bake cheesecake?
Some of the best toppings include fresh berries like strawberries, raspberries, or blueberries, which can also be made into a simple fruit sauce. Whipped cream, lemon curd, or a drizzle of salted caramel are also incredibly popular choices that complement the creamy flavor beautifully.
What kind of cream cheese should I use for no-bake cheesecake?
You should always use full-fat brick cream cheese, softened to room temperature. Avoid using cream cheese spreads or lower-fat versions, as these contain more water and will not provide the necessary richness and stability, which could result in a runny or lumpy filling.
How can I prevent a lumpy cheesecake filling?
The key to preventing a lumpy filling is ensuring your cream cheese is at room temperature before you start. Beat the softened cream cheese thoroughly with the sugar until it is completely smooth and creamy before adding any other liquid ingredients like sour cream or lemon juice.
How do you determine ‘stiff peaks’ for heavy cream?
Stiff peaks mean the whipped cream is firm enough to hold its shape when you lift the whisk. The peak should stand straight up without collapsing or looking dry and crumbly. If it is too soft and collapses, it is not firm enough; if it looks grainy, you have over-whipped it.
Can I make mini no-bake cheesecakes with this recipe?
Yes, you can easily adapt this recipe to make mini cheesecakes! Line a muffin tin with paper liners, use about 1-2 tablespoons of the crust mixture per liner, and then spoon the filling on top. Mini versions generally require a shorter chilling duration, typically around 3-4 hours, though overnight is still best for the firmest set.
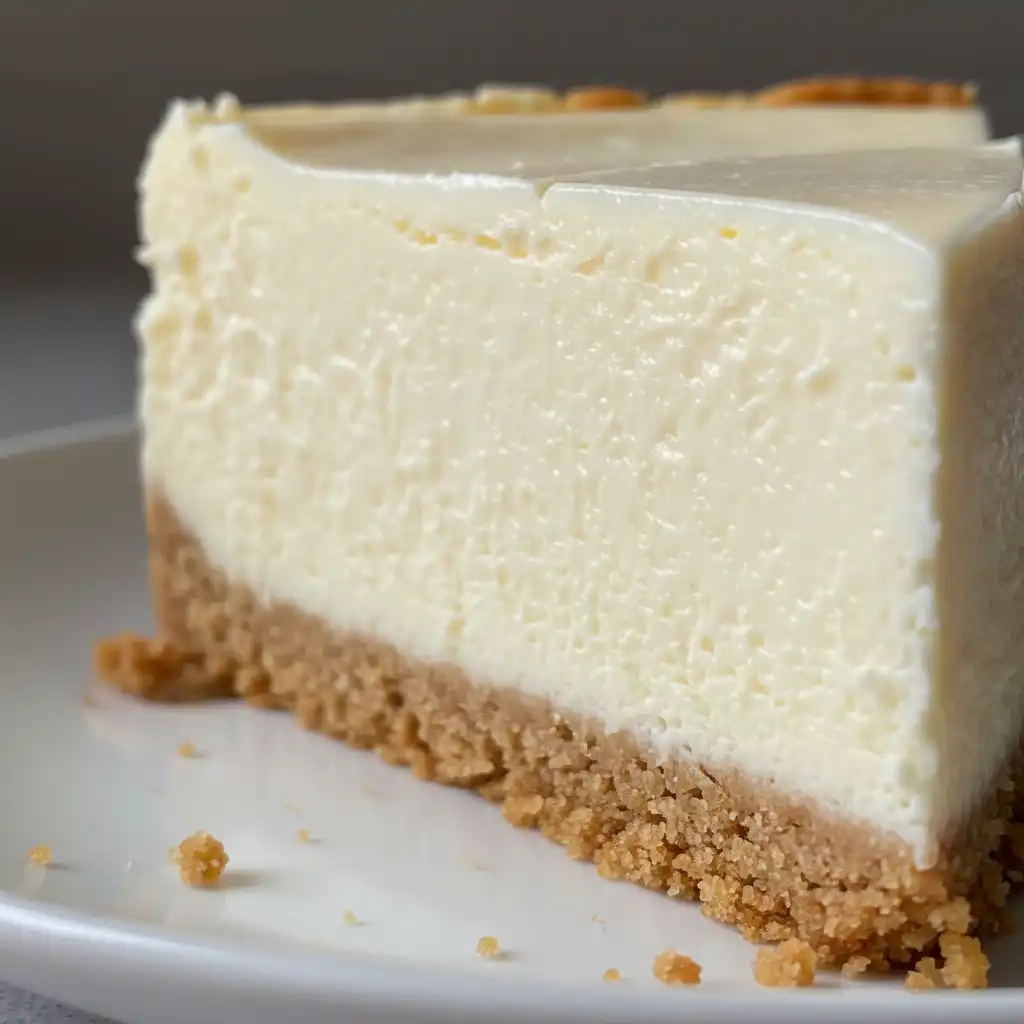
Perfect No-Bake Cheesecake: Your Easiest & Most Stable Dessert Ever
Ingredients
Equipment
Method
- First, let’s make our sturdy graham cracker crust. In a medium bowl, stir together the graham cracker crumbs, brown sugar, and melted unsalted butter until fully combined and resembling wet sand. Pour this mixture into a 9-inch or 10-inch springform pan. Now, this is important: pack the mixture very tightly into the bottom and slightly up the sides of the pan. I recommend using the bottom of a flat-bottomed measuring cup to press it down firmly. The tighter it is packed, the less likely your crust will crumble when you slice the cheesecake. Place the pan in the freezer for 10-20 minutes while you prepare the filling; this helps it set up even more securely.
- In a large bowl, using a hand mixer or a stand mixer fitted with a whisk attachment, whip the cold heavy cream on medium-high speed. Continue to whip for about 4-5 minutes until the cream forms stiff peaks. You will know it is ready when the cream holds its shape firmly on the whisk and does not droop. Be careful not to over-whip, which can turn it grainy. Set the perfectly whipped cream aside.
- In a separate large bowl, using a hand mixer or a stand mixer fitted with a whisk or paddle attachment, beat the room temperature full-fat brick cream cheese and granulated sugar together on medium speed. Continue beating until the mixture is perfectly smooth and wonderfully creamy, making sure to scrape down the sides and up the bottom of the bowl with a silicone spatula as needed. Add the confectioners’ sugar, sour cream, lemon juice, and pure vanilla extract. Beat for another 2-3 minutes on medium-high speed until everything is smooth and thoroughly combined. It is vital to ensure there are no large lumps of cream cheese; if you see any, keep beating until the filling is silky smooth.
- After beating in the sugars and other liquids, and before folding in the whipped cream, carefully stir in the bloomed gelatin (1 teaspoon dissolved in 2 tablespoons of hot water) into the cream cheese mixture. Mix it in thoroughly until fully incorporated. This step is crucial; the gelatin ensures extra stability and a firmer set for your no bake cheesecake, guaranteeing a fantastic texture.
- Now for the delicate part. Using your mixer on low speed or, preferably, a silicone spatula, gently fold the whipped cream into the cheesecake filling. This takes several turns, moving the spatula from the bottom of the bowl up and over the mixture. Combine slowly and carefully, as you do not want to deflate all that wonderful air you whipped into the heavy cream. This gentle folding technique is key to maintaining a light, mousse-like consistency for your cheesecake.
- Remove the prepared graham cracker crust from the freezer. Spoon the creamy no bake cheesecake filling evenly into the crust. Use an offset spatula to spread and smooth down the top, creating a beautiful, even surface. Cover the springform pan tightly with plastic wrap or aluminum foil and refrigerate the cheesecake for at least 6-8 hours. For the best, sturdiest results and the cleanest slices, I highly recommend chilling it for 12 hours or even better, overnight. The longer it is refrigerated, the nicer the no-bake cheesecake will set up.
- Once thoroughly chilled, your no-bake cheesecake is ready for its grand debut. Use a knife to carefully loosen the chilled cheesecake from the rim of the springform pan before removing it. For neat, professional-looking slices, use a clean, sharp knife and wipe the blade clean with a warm, damp cloth between each cut. This prevents crumbs and filling from sticking, ensuring every slice is pristine. Serve with your desired toppings.