
There is nothing quite like biting into a perfectly crispy, sticky, sweet, and savory chicken wing. For me, creating that experience at home has always been a passion. If you have ever wondered how to achieve restaurant-quality crispy honey garlic chicken wings without the hassle of deep frying, you are in the right place. I am excited to share my ultimate oven-baked recipe that guarantees incredibly crunchy, flavorful wings every single time. Get ready to master the art of homemade wings that are perfect for any gathering or a delicious weeknight treat.
Looking for a quicker, weeknight-friendly option? Try my honey garlic chicken stir fry, a fast and flavorful dish that comes together in no time.
Table of Contents
Table of Contents
Why You’ll Love This Recipe
Unrivaled Crispy Texture. My secret for achieving unbelievably crispy chicken wings, reminiscent of fried wings, comes from a simple addition: 1 teaspoon of aluminum-free baking powder mixed into the all-purpose flour. This unique twist makes all the difference.
Scientific Logic for Crispy Perfection. The baking powder works wonders by raising the pH of the chicken skin. This helps accelerate the Maillard reaction during baking, which is crucial for deeper browning and an intensified umami flavor. Even more remarkably, it creates tiny air bubbles on the skin’s surface. These bubbles expand in the oven, transforming into an exceptionally crispy texture without any deep frying. It also aids in absorbing surface moisture, which is a critical factor for achieving maximum crispiness.
Effortless & Less Mess. Say goodbye to the splattering oil and cleanup of deep frying. This oven baked method delivers fantastic results with significantly less mess.
Foolproof Perfection. This technique is designed to boost your confidence in the kitchen, making it easier to achieve consistently perfect, restaurant-quality honey garlic chicken wings every time you make them.
Crowd-Pleaser. Whether it is for game day, a lively party, or just a fun family dinner, these crispy chicken wings are guaranteed to be a hit with everyone.
Ingredients Needed
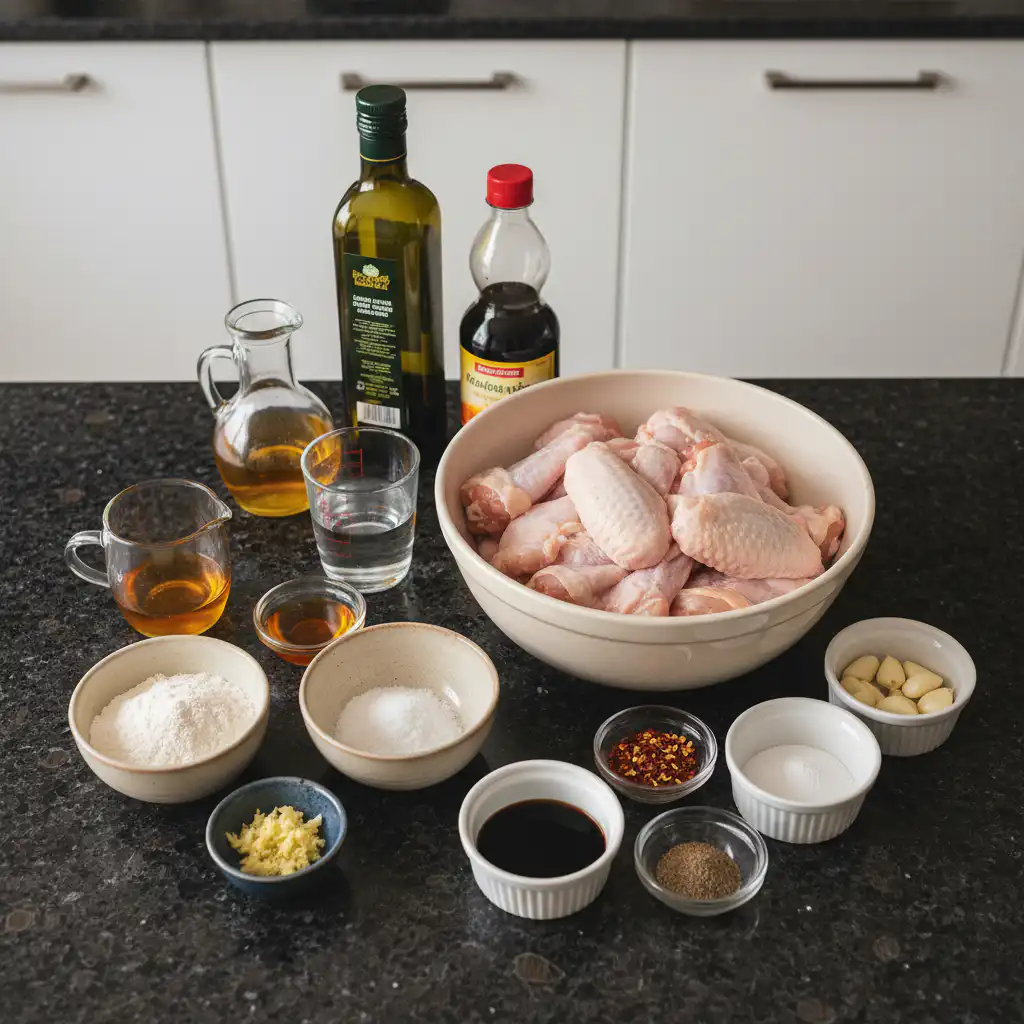
50 chicken wings
¼ cup all-purpose flour
salt and black pepper (to taste)
1 tablespoon olive oil
½ cup honey
⅓ cup water
4 tablespoons soy sauce
4 cloves garlic (minced)
1 tablespoon minced fresh ginger
1 teaspoon cornstarch
½ teaspoon red pepper flakes
Ingredient Notes & Substitutions
Chicken Wings: I typically use a mix of drumettes and flats for my crispy chicken wings. If you buy whole wings, you can easily split them yourself at the joint. Drumettes and flats cook similarly, ensuring even results. For the best crispiness, I always recommend using thawed wings. To ensure food safety, always use a meat thermometer to verify your poultry reaches a safe internal temperature of 165°F.
All-Purpose Flour: The all-purpose flour in this recipe is key to forming a light, crispy crust. Remember my unique twist: mix in 1 teaspoon of aluminum-free baking powder with the flour. This alkaline addition is what truly enhances the crispiness.
Soy Sauce: A good quality soy sauce is vital for that rich umami flavor in your sticky sauce. For dietary needs, feel free to use a low-sodium soy sauce; just be mindful that you might need to adjust the salt to taste. Dark soy sauce can be used if you want a deeper color, but it might slightly alter the final flavor profile.
Honey: You can use various types of honey, such as clover or wildflower, for this honey garlic sauce. A user once asked about truffle honey; while it would add a unique flavor, I have not personally tested it in this specific honey garlic chicken wings recipe, so proceed with caution if you are experimenting.
Fresh Garlic & Ginger: For the most vibrant and aromatic depth, fresh garlic and fresh ginger are truly important, much like when making an easy garlic chicken. If you must substitute, remember that the flavor will be less intense. A general guideline is to use about ¼ teaspoon of ground ginger or garlic powder for every 1 teaspoon of fresh minced ginger or garlic.
Gluten-Free Option: To make these honey garlic chicken wings gluten-free, simply substitute the all-purpose flour with a gluten-free all-purpose blend, such as rice flour or cornstarch. Additionally, ensure you are using a gluten-free soy sauce.
Cornstarch: This ingredient is our secret weapon for achieving a beautifully thick and glossy coating on our chicken wings. It acts as an excellent thickening agent for the honey garlic sauce.
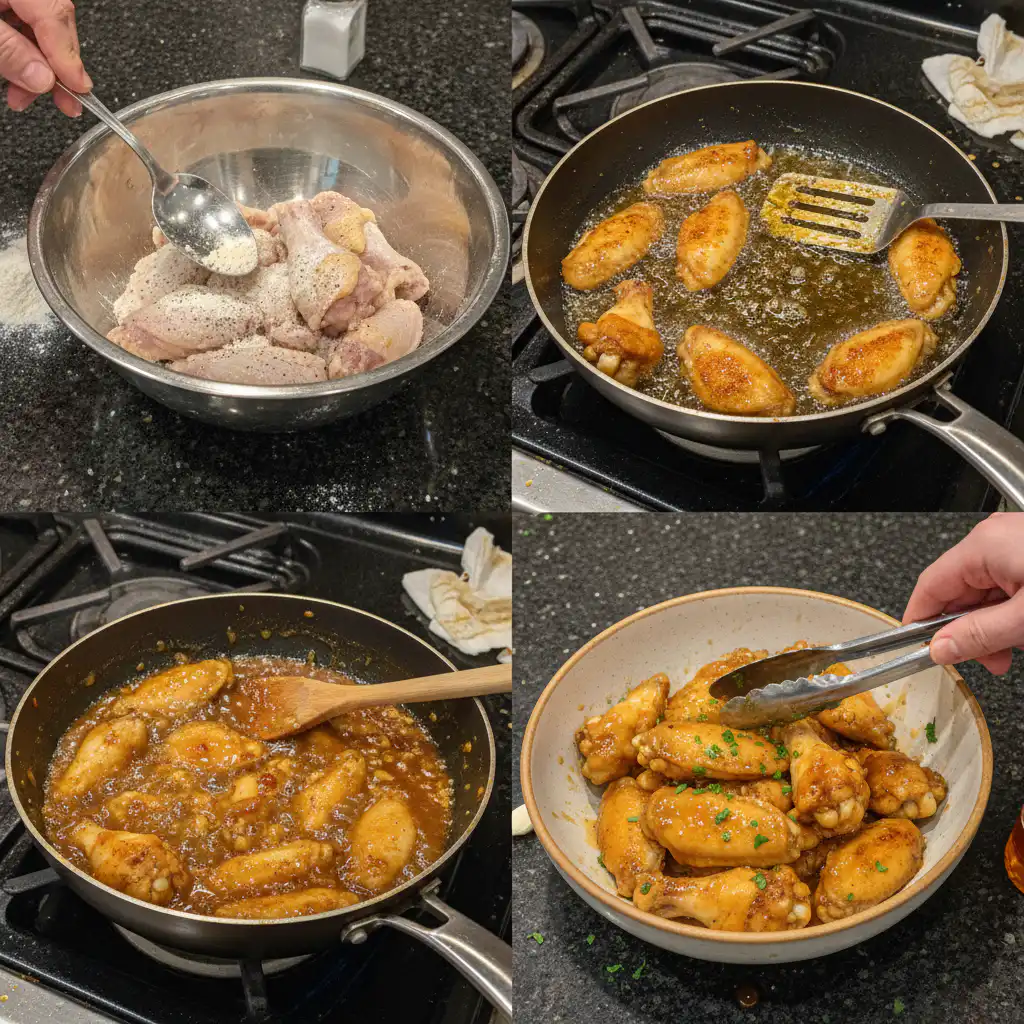
How to Make Crispy Honey Garlic Chicken Wings
Step 1: Prep the Wings & Oven
First, preheat your oven to a high temperature of 425°F. This high heat is crucial for quick crisping. Next, and this is a critical step for maximum crispiness, dab your chicken wings with paper towels until they are completely dry. Removing all surface moisture is the most important part of getting crispy skin.
Step 2: Flour & Oil
In a large bowl, toss the dried wings with the all-purpose flour, salt, and black pepper. Do not forget to include that 1 teaspoon of aluminum-free baking powder in your flour mixture for that extra crispness. Make sure to remove any excess flour, leaving only a thin, even dusting on each wing. Then, brush each wing with olive oil or use an olive oil spray to ensure an even coating.
Step 3: First Bake
Line a baking pan with foil for easy cleanup, and then place parchment paper on top. If you have many wings, you may need two pans. For the best results and all-around crispiness, arrange the wings on a wire rack set over the prepared baking sheet. This allows air to circulate underneath. Bake the wings for 35 minutes, making sure to turn them over after 20 minutes to ensure even cooking and browning.
Step 4: Craft the Sauce
While the wings are baking, combine all the sauce ingredients in a small pan. This includes the honey, water, soy sauce, minced garlic, minced fresh ginger, cornstarch, and red pepper flakes. Bring the mixture to a boil, then reduce the heat and let it simmer for about 10 minutes. The sauce is ready when it has slightly thickened and coats the back of a spoon. It will be gloriously sticky.
Step 5: Saucing & Second Bake
Carefully remove the wings from the oven. Immediately and thoroughly toss them in a large bowl with the prepared sticky honey garlic sauce, ensuring every wing is beautifully coated. Return the sauced wings to the oven for another 10 minutes, turning them after 5 minutes. This second bake allows the sauce to caramelize and fully adhere to the crispy wings without burning.
Step 6: Cool & Thicken
Once the wings are out of the oven, allow them to cool for 10 minutes. This cooling period is important because as the sauce cools, it thickens further and becomes incredibly sticky. Stir the wings every few minutes to make sure they are evenly coated in the rich, glossy sauce as it thickens.
Air Fryer & Freezer Instructions
Air Fryer Instructions
You can absolutely make these honey garlic chicken wings in an air fryer for a similarly crispy result. After prepping and flouring the wings as directed in Step 2, arrange them in a single layer in your air fryer basket without overcrowding. You will likely need to cook in batches. Air fry at 375-400°F for 18-25 minutes, flipping them halfway through. The exact time will depend on your air fryer model and wing size. Once cooked to your desired crispness, toss them immediately with the prepared sauce. You can then return them to the air fryer for 3-5 minutes at 375°F to allow the sauce to caramelize and adhere. Remember to avoid overcrowding for optimal crispiness.
Freezing Honey Garlic Chicken Wings
These chicken wings are perfect for making ahead or storing for later.
Uncooked Wings: Prepare the wings through Step 2 (pat dry and coat with the flour mixture). Lay them in a single layer on a parchment-lined baking sheet and flash freeze for 1-2 hours until solid. Once frozen, transfer them to a freezer-safe bag or container, removing as much air as possible. They will keep for up to 3 months. When ready to bake, you can bake them from frozen, adding about 10-15 minutes to the initial bake time.
Cooked Wings: If you have leftover cooked and sauced wings, allow them to cool completely. Arrange them in a single layer on parchment paper on a baking sheet and freeze until solid. Then transfer them to an airtight freezer bag or container. They will last for 2-3 months. Reheat as directed below.
Pro Tips & Troubleshooting
Pro Tips
The Drying Secret: I cannot stress this enough – always dab your chicken wings with paper towels until they are completely dry. This single step is the most critical for achieving maximum crispiness.
Thin Flour Dusting: Ensure the flour mixture, including our secret baking powder, creates just a thin, even coating on the wings. Avoid any clumps, as a thick coating will result in a cakey rather than light, crispy crust.
High Heat for Crisping: Preheat your oven to a high temperature of 425°F. This intense heat helps the wings crisp up quickly and brown beautifully.
Wire Rack Advantage: For superior all-around crispiness and to prevent soggy bottoms, I always recommend using a wire rack set over your foil-lined baking sheet. This allows hot air to circulate evenly around each wing.
Perfectly Thick Sauce: Simmer the honey garlic sauce until it just slightly thickens and coats the back of a spoon. Be careful not to over-reduce it too early, as it will continue to thicken as it cools.
Post-Saucing Cool Down: This is another pro tip for that ultimate sticky sauce. After tossing your hot wings with the sauce, allow them to cool for about 10 minutes. The sauce will naturally thicken and become gloriously sticky as it cools.
Easy Cleanup: Save yourself some scrubbing by lining your baking pan with foil first, then placing parchment paper on top. Cleanup will be a breeze.
Common Mistakes to Avoid
Skipping the Drying Step: Not thoroughly drying chicken wings before seasoning them is the number one reason for less crispy skin. Excess moisture steams the wings instead of crisping them.
Too Much Flour: Applying a thick or clumpy flour coating will not lead to a crispy texture. Instead, you will get a dense, cakey layer that detracts from the wing’s appeal.
Overcooking (The ‘Mummified’ Wing): While crispiness is key, be mindful of cooking times. Overcooking, especially at too high a temperature or without sufficient sauce coating, can result in dry, brittle, or ‘mummified’ wings that are no fun to eat.
Cold Wings to Hot Oven: For more even cooking, try to let your wings sit at room temperature for about 15-20 minutes before placing them in the hot oven.
Burning the Sauce: During the second bake, keep a close eye on your wings. The sugars in the honey garlic sauce can caramelize very quickly, and you do not want them to burn. A beautifully caramelized sauce is sticky and rich, not charred.
Serving & Storage
Serving Ideas
Classic Appetizer: These crispy honey garlic chicken wings are the quintessential party appetizer or game-day snack. They disappear fast!
Veggie Platter: Pair your wings with a refreshing veggie plate. Crisp celery sticks and crunchy broccoli florets offer a lovely contrast and a cooling bite.
Dipping Sauces: While the sticky sauce is fantastic on its own, offering a variety of dipping sauces can be a nice touch. Creamy ranch dressing or a tangy blue cheese dressing are always popular choices.
Complementary Sides: For a more complete meal, serve these wings alongside other American or Asian-fusion party snacks (such as BBQ chicken sliders), or flavorful sides like the best Mexican street corn, steamed rice, or a light, crisp salad.
Garnish: For visual appeal and a burst of fresh flavor, I love to garnish my honey garlic chicken wings with a sprinkle of sesame seeds and some finely chopped green onions.
Storage and Make-Ahead
Fridge Storage: Store any leftover honey garlic chicken wings in an airtight container in the refrigerator for 3-4 days.
Reheating Leftovers: To bring your leftover wings back to their crispy glory, avoid the microwave or slow cooker, as these will make them soggy.
Oven: Reheat in a preheated oven at 350°F until warmed through and crispy again, which usually takes about 10-15 minutes.
Air Fryer: For quick crisping, reheat in an air fryer at 350°F for 5-7 minutes. This method is excellent for regaining that initial crunch.
Make-Ahead Tips: You can prepare the sauce ingredients in advance and store them in the fridge, ready to simmer when needed. You can also par-bake the wings (bake through the first bake), then cool, refrigerate, and finish with the sauce and second bake closer to serving time for fresh results.
Conclusion
There you have it – my tried and true recipe for incredibly crispy, sticky, sweet, and savory honey garlic chicken wings, made easy right in your oven. Thanks to our unique baking powder twist and detailed instructions, you can achieve restaurant-quality results every single time. Even if you are a beginner in the kitchen, these tips and clear steps will guide you to perfection. I encourage you to try this recipe, adjust the red pepper flakes to your preferred spice level, and get creative with your serving suggestions. Don’t forget to pin this recipe for later and share your delicious creations with us in the comments!
FAQ
How do you get crispy honey garlic chicken wings in the oven?
The key to crispy oven baked honey garlic chicken wings lies in three main steps: thoroughly patting the wings dry, coating them with a thin layer of all-purpose flour mixed with aluminum-free baking powder, and baking them at a high temperature (425°F) on a wire rack for proper air circulation.
What is the best way to store and reheat leftover honey garlic chicken wings?
Store leftover honey garlic chicken wings in an airtight container in the refrigerator for 3-4 days. To reheat and maintain crispiness, use a preheated oven at 350°F for 10-15 minutes, or an air fryer at 350°F for 5-7 minutes. Avoid using a slow cooker or microwave as they will make the wings soggy.
Can I make honey garlic chicken wings in an air fryer?
Yes, you can make these honey garlic chicken wings in an air fryer. After flouring the wings, air fry them in a single layer at 375-400°F for 18-25 minutes, flipping halfway. Toss with the sauce, then return to the air fryer for another 3-5 minutes to caramelize the sauce.
What are some popular dipping sauces that pair well with honey garlic wings?
Classic dipping sauces that pair wonderfully with honey garlic wings include creamy ranch dressing and tangy blue cheese dressing. These provide a cool, contrasting flavor to the sweet and savory wings.
What makes the honey garlic sauce thick and sticky?
The honey garlic sauce achieves its thick and sticky texture primarily from the cornstarch. As the sauce simmers, the cornstarch acts as a thickening agent, creating a glossy, rich coating that adheres beautifully to the crispy chicken wings.
Can I substitute other types of honey or soy sauce in this recipe?
Yes, you can substitute different types of honey like wildflower or clover honey. For soy sauce, low-sodium varieties work well, though you might adjust salt. Dark soy sauce can add color but may slightly alter the taste. Ensure a gluten-free soy sauce is used if needed.
Why did my oven-baked chicken wings turn out dry/mummified?
Your oven-baked chicken wings likely turned out dry or “mummified” if they were overcooked, especially at too high a temperature for too long. Ensure you monitor cooking times closely and do not bake them for excessive periods to prevent them from becoming brittle and dry.
Why does flour (with baking powder) help make wings crispy?
The all-purpose flour provides a thin coating that becomes a crispy crust. The addition of aluminum-free baking powder is key because it raises the pH of the chicken skin, accelerating the Maillard reaction for deeper browning and umami. It also creates tiny air bubbles that expand, leading to an exceptionally crispy texture, similar to fried chicken.
Can I use ground ginger or garlic powder instead of fresh?
While fresh ginger and fresh garlic provide the best, most vibrant flavor for the honey garlic sauce, you can substitute with ground ginger or garlic powder. A good ratio to remember is that 1 teaspoon of fresh minced ginger or garlic is roughly equivalent to ¼ teaspoon of its dried, ground counterpart. The flavor profile will be less intense with dried spices.
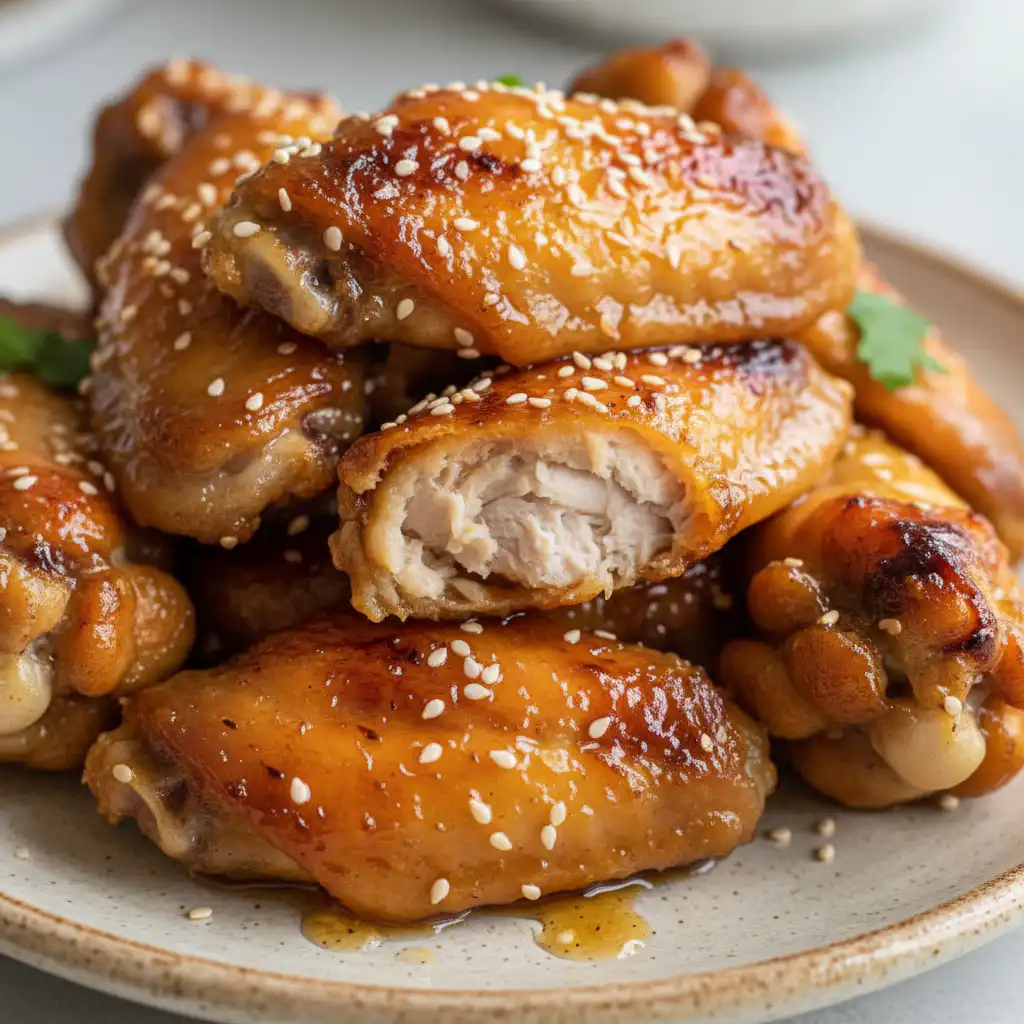
Crispy Honey Garlic Chicken Wings (Oven Baked)
Ingredients
Equipment
Method
- First, preheat your oven to a high temperature of 425°F. This high heat is crucial for quick crisping.
- Next, and this is a critical step for maximum crispiness, dab your chicken wings with paper towels until they are completely dry. Removing all surface moisture is the most important part of getting crispy skin.
- In a large bowl, toss the dried wings with the all-purpose flour, salt, and black pepper. Do not forget to include that 1 teaspoon of aluminum-free baking powder in your flour mixture for that extra crispness.
- Make sure to remove any excess flour, leaving only a thin, even dusting on each wing.
- Then, brush each wing with olive oil or use an olive oil spray to ensure an even coating.
- Line a baking pan with foil for easy cleanup, and then place parchment paper on top. If you have many wings, you may need two pans.
- For the best results and all-around crispiness, arrange the wings on a wire rack set over the prepared baking sheet. This allows air to circulate underneath.
- Bake the wings for 35 minutes, making sure to turn them over after 20 minutes to ensure even cooking and browning.
- While the wings are baking, combine all the sauce ingredients in a small pan. This includes the honey, water, soy sauce, minced garlic, minced fresh ginger, cornstarch, and red pepper flakes.
- Bring the mixture to a boil, then reduce the heat and let it simmer for about 10 minutes. The sauce is ready when it has slightly thickened and coats the back of a spoon. It will be gloriously sticky.
- Carefully remove the wings from the oven. Immediately and thoroughly toss them in a large bowl with the prepared sticky honey garlic sauce, ensuring every wing is beautifully coated.
- Return the sauced wings to the oven for another 10 minutes, turning them after 5 minutes. This second bake allows the sauce to caramelize and fully adhere to the crispy wings without burning.
- Once the wings are out of the oven, allow them to cool for 10 minutes. This cooling period is important because as the sauce cools, it thickens further and becomes incredibly sticky.
- Stir the wings every few minutes to make sure they are evenly coated in the rich, glossy sauce as it thickens.